Showing posts with label Z Box Fold Card. Show all posts

Monday, August 1, 2022

Scor-Pal "More Than One Score"

I was recently asked to make a teacher appreciation card, so I combined it with this month's Scor-Pal "More Than One Score" -- just in time for school to start.  It qualifies for the "Anything Goes" category.

There are several different versions of Z-fold cards; this one is called a Z box fold.  In some versions of this card, the front horizonal strip goes all the way to the edge of the card.  I needed a little more room on that front panel, so I cut it short.


The image is a digital one from Paper Nest Dolls -- Teacher Emma, and the sentiment on the blackboard is from Kindred Stamps' Masters of Magic stamp set.

Saturday, June 1, 2019

Scor-Pal "More Than One Score" - Warmer Days

It's June 1st, time for another Scor-Pal "More Than One Score challenge.  This month the theme is "Warmer Days.   Summer is already here in Florida . . . and much of the rest of the country.  It has been in the 90s for weeks here.

For my challenge card I made a Z-Box Fold Card.  Of course, I used my Scor-Pal to make the several score lines for the folds and Scor-Tape to hold down much of the background paper.


In addition, I used several dies from Karen Burniston to create my scene -- Tropical Landscape and Beach Charms.

If you'd like to join in on our summer fun and maybe win a $25 gift certificate to the Scor-Pal store, make a card and post it on the Scor-Pal blog.

Friday, February 1, 2019

Scor-Pal February Challenge -- Anything Goes

The Scor-Pal Challenge team is back to work again after our little holiday in January.  The challenge for February is "Anything Goes."  I took the opportunity to use a brand-new stamp set from Kindred Stamps that I just love -- Size Doesn't Matter.  If you are familiar with the works of J.R.R. Tolkien, you will recognize my small characters.


I made a fun card using my Scor-Pal -- a Z Box Fold card.  If you've never made one, it's pretty easy.  Here is a link to a tutorial for you to reference if you give it a try.  The person who wrote the tutorial used a different type scoring tool, but I used my 12" x 12" Scor-Pal for the scoring.


The breakfast items for both first and second breakfast were made with several dies from CottageCutz.

Pop on over to the Scor-Pal blog and check out what the rest of the team made for this challenge.  And, by the way, the Scor-Pal team is having a Design Team Call.  If you think you'd like to be part of our team, make a card and post it on the blog.

Friday, January 11, 2019

Kindred Stamps Color Challenge

This month's challenge on the Kindred Stamps Fan Club Facebook page is a color challenge.   This year's Pantone Color of the Year is Living Coral.  As a design team member, I'm probably not eligible for a prize; but I thought I would make a card to entice others to enter.  I'm using a set from one of my favorite fandoms (Catcher of Beasts) and a fun technique (Z-Box Fold card).

In looking at the front of the card, you can barely see the coral on the card base; but when the card is open fully, you can see more.
As I was coloring the images for this card, I thought I could give both characters some coral -- the sweet witch's coat and the baker's tie.  I found a piece of patterned paper I used as the basis for my color combination, pulling out the turquoise for the other color.  If you like this style of card, here's a link to a tutorial which explains how to make one.

Why don't you join in on the fun and make a card for the Kindred Stamps color challenge?

Monday, October 1, 2018

Halloween Z-Box Fold Card

It's October -- time for colorful leaves, pumpkins, and Halloween!  Halloween is what I'm bringing you today.  CottageCutz has a brand-new release of really cool Halloween dies -- currently on sale at 25% off, along with their Christmas (Part 3) release.

I'm a big fan of fun-fold cards, and my card today is a relatively simple fun-fold card -- a Z-Box Fold card, using two of the new Halloween dies.


To start the card, cut cardstock and patterned paper as follows:

Black - 4 1/4" x 5 1/2"
Orange - 4" x 9 3/4"
Patterned paper - 4 3/8" x 2 7/8"
Patterned paper - 7/8" x 5 1/8" (one piece), 7/8" x 2 1/8" (two pieces)


Place the orange cardstock in your paper trimmer with the short side at the top and place the long side at the 1" mark.  Cut a 1" slit from the 3" mark down to the 7 1/2" mark.


Place the cardstock in your scoring board and score down to the cut line at the 3" mark, up from the bottom at the 7 1/2" mark, and all the way through at the 5 1/8" mark.


Place Scor-Tape on the back of the largest section of the orange cardstock, as shown.


Fold on the score lines and adhere to the black 4 1/4" x 5 1/2" panel.


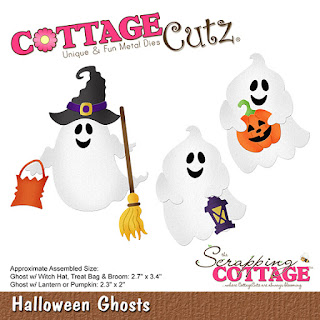
Cut three ghosts from the die.


Color and construct the ghosts.


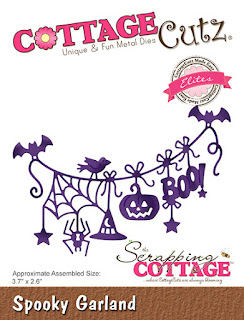
Cut the Spooky Garland from a scrap of black cardstock.


Adhere the patterned paper to the card base and sponge around the front panel.  Add the ghosts and garland, and your card is completed.


CottageCutz dies used on this card are:

http://www.scrappingcottage.com/cottagecutzhalloweenghosts.aspx

http://www.scrappingcottage.com/cottagecutzspookygarlandelites.aspx

Sunday, March 25, 2018

Pinterest-Inspired Z-Fold Box Card

Once a month a member of the Scor-Pal design team looks for inspiration on our Pinterest board and recreates the project to make it her own.  My inspiration this month is a Z Box Fold Card created by Lyndsey on The Craft Blog.  This is her card.


To make my card I used a brand-new stamp set  from Kindred Stamps called Students of Magic.  Kindred Stamps has a large selection of pop culture stamps, including a single stamp called Owl Post, which is perfect for decorating the accompanying envelope.

This is my finished card:


I started my card by stamping and coloring the three young wizards in the stamp set.  After they were colored, I cut them out.


I cut an 8 1/2" x 11" piece of brown cardstock into three panels:

1 piece 4 1/4" x 11"
2 pieces 2 1/8" x 11"

I scored the larger panel and one of the small panels at 2 3/4" and 5 1/2".


I then applied patterned paper (cut 1/4" smaller on both sides) to the various sections of each panel.


On the reverse side of the smaller panel I applied Scor-Tape at each end, as shown in the photo.


I then adhered this smaller panel to the larger panel, slightly above the bottom edge.


The other 2 1/8" x 11" strip of brown cardstock was scored as follows:  7/8", 3 5/8", 4 1/8", 6 7/8", 7 3/8" and 10 1/8".  I adhered panels of patterned paper to the "front" panels of this inner strip . . .


. . . and inserted it into the box.


I then cut an inverted scalloped circle from the same brown cardstock and added Scor-Tape strategically in order to adhere it to the front of the card.


I added a smaller circle of patterned paper and one of the wizards to the front of the circle and adhered the circle to the front of the card.  You can't see it well, but I added some clear glue to his glasses.


I cut two small strips of acetate, attached them to the other two wizards, and placed them "in the box."   Using stamps from a Just Rite set, I made the train platform sign and attached it to the back wall.


The original card had a sentiment on the small panel on the right, but I wanted to add something more appropriate to the scene.  So I Googled some free clip art and found some luggage and a bird cage.  The luggage I printed onto cream cardstock, and the birdcage I printed on a piece of acetate.  I cut them out with scissors.


Notice that I cut out two of the small brown suitcases.  When I adhered them to my card, I added the second brown suitcase with foam dots to make a little 3-D effect.  I stamped the owl from the stamp set, cut him out, and adhered him to the card above the suitcase.  When I adhered the acetate birdcage over the owl so it looks like he's inside the cage, it was a little difficult to see the cage.  So using a Faber Castell XS black pen, I went over the cage lines.  This made the cage a bit more noticeable. 


I then stamped the "Owl Post" image to the lower left-hand corner of my envelope.


And now my project was complete.


Note that the card folds flat to fit inside a standard envelope.


Thursday, January 4, 2018

CCEE1801 Waddle We Do in 2018?

Liz Williams started the new year off with a little pun -- "Waddle we do in 2018?"  She asked the CCEE stampers to use a penguin or other animal that loves the cold.  Right before Christmas I had bought a cute little Mama Elephant winter set with some skating penguins.  They were perfect for Liz's challenge.  I tried a new Heartfelt Creations product on my trees.  It's called Frosting Powder.  I love it!


Stop over at the CCEE blog to see what the rest of the team did with Liz's challenge.

Monday, December 18, 2017

Feel Better Bear

CottageCutz recently released a whole bunch of "Get Well" dies for your pleasure.  And they feature some really cute images.  I'm using several of these dies on my card today.  Again, I've made something other than an A2 card -- it's a Z Box Fold card, using both Bear Patient die and the Ouch with Tooth die, as well as a Double-Stitched Square die.


As I wasn't sure which of the images from the Bear Patient die I was eventually going to use, I cut all the pieces out of white cardstock so that I could color them.  I knew I was only going to use one sentiment from the Ouch with Tooth die, so I just cut it out of red cardstock.


Using various Copic markers and a couple of Wink of Stella brushes, I colored the bear pieces and constructed the various images.


I then cut the cardstock for the base of my card -- a 4 1/4" x 5 1/2" piece of dark brown and a 9 3/4" x 4" piece of kraft.


I scored the long piece at 5 1/4".   With the short edge of this piece at the top of my paper cutter and the long edge at the 1" mark, I cut a slit from the 3" mark to the 7 1/2" mark.   IMPORTANT:  If you decide to make a similar card, be sure that the larger section of the cardstock strip is at the top before you cut the slit.  (Ask me what happens when you don't place it in your paper cutter the correct way!)


I placed the strip on my Scor-Pal with the long edge across the top and the larger section toward the left.  I then scored at the 3" mark down to the slit.  At the end of the slit (at the 7 1/2" mark), I scored down to the edge.  (I slightly folded on the score lines so that you can see them.)


Fold on the score lines to make the "box."


Apply Scor-Tape to the back of the 4 3/4" x 4" section, as shown.


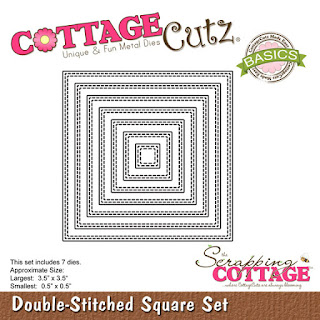
Now it was time to cut the background panels of the card.  I wanted to use the Double-Stitched Squares and Rectangles on my card, but the rectangles weren't quite the right size.  So I just cut the front panel with the die and the rest of the panels as listed:

Cream cardstock - 2 1/2" Double-Stitched Square, 4" x 2 1/2" rectangle
Dark brown cardstock - 2 3/4" square, 4 1/4" x 2 3/4" rectangle, 3/4" x 5" strip, and (2) 3/4" x 2" strips
Patterned paper - 1/2" x 4 3/4" strip and (2) 1/2" x 1 3/4" strips


I layered the panels and adhered them to the front of the card.


I then glued the die cuts to the front and inside panels . . .


. . . removed the protective covering from the Scor-Tape and glued the back panel to the dark brown card base, carefully centering it.


And my card was complete.


CottageCutz dies used on my card are:

http://www.scrappingcottage.com/cottagecutzbearpatient.aspx

http://www.scrappingcottage.com/cottagecutzouchwithtooth.aspx


http://www.scrappingcottage.com/cottagecutzdouble-stitchedsquaresetbasics.aspx