Showing posts with label Shaker Card. Show all posts

Friday, April 28, 2023

Buzzing By to Say Hello

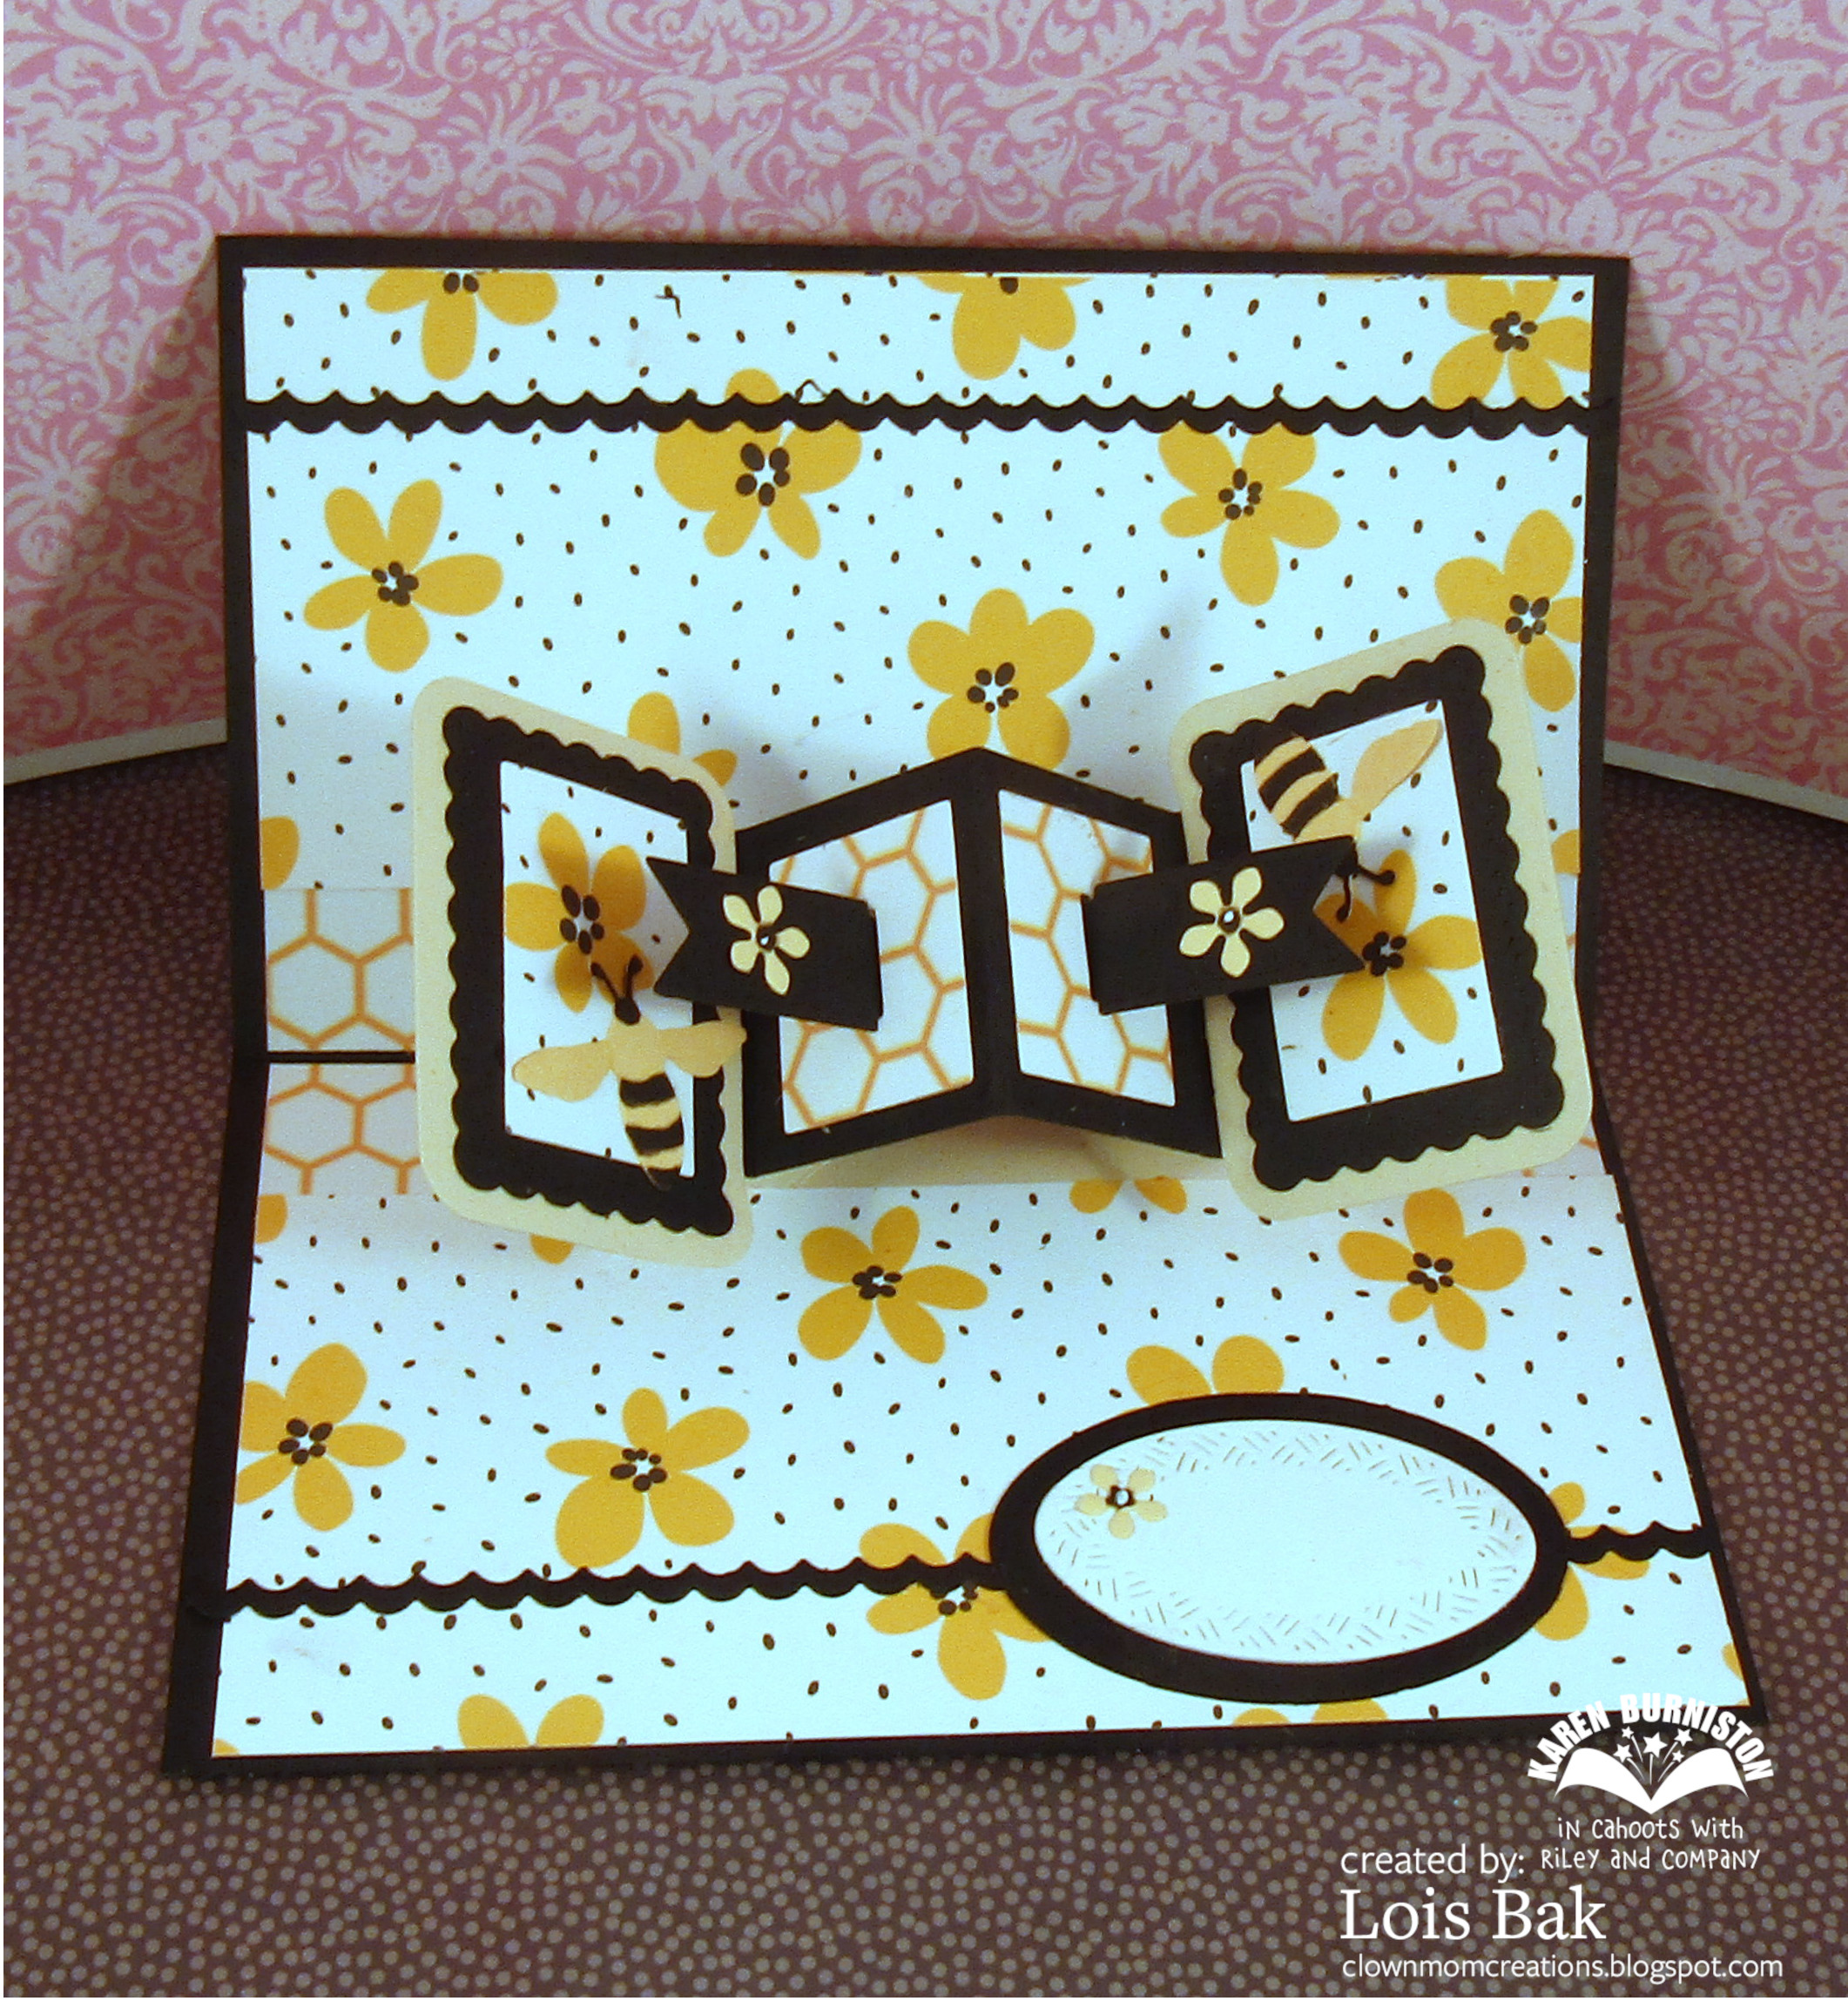
I've got a cute little mini slimline card for you today -- using several Karen Burniston dies, the main one being the new Little Twist Panel.  

The front of the card actually features several dies from the Flutter Charms set along with a sentiment from Honey Bee Stamps.  And, as you can see, I made a little shaker element out of the honeycomb die.


Also on the front are dies from one of the Border Blends sets and the hello die

The new die (the Little Twist Panel) is on the inside, along with a couple bees from the Flower Pot Pop-Up set.


I carried the Border Blends die-cut inside and added a couple of flowers from the Tiny Trees Pop-Up set to the flags.  The panel on which to sign the card was made using the Crosshatch Ovals.  Both patterned papers used on this card are from Honey Bee Stamps.

This is just a cute little card you could send to anyone just to say "hi."


Tuesday, March 1, 2022

Karen Burniston Designer Challenge -- Shaker Cards

The Karen Burniston Designer Challenge this month has a really fun theme -- shaker cards!  As it happens, I recently purchased some supplies from Creek Bank Creations made specifically for shaker cards -- foam tape A2 frames and "shaker satchels", clear bags made specifically to hold shaker pieces.

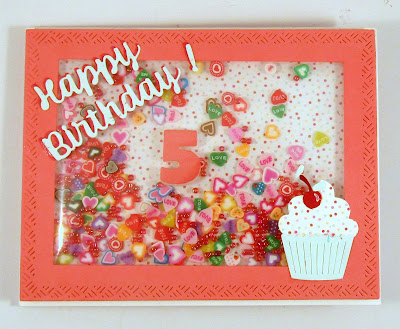
This card was made for my great-granddaughter's 5th birthday.


I made the frame by using two of the Karen Burniston Crosshatch Rectangles.  I added the "Happy Birthday" from Word Set 2 - Birthday, the cupcake from the Cupcake Pop-Up, and the "5" from the Numbers set.  BTW, the "5" is adhered inside the shaker satchel on foam tape.

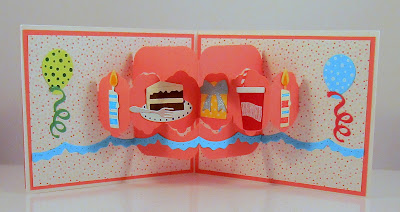
On the inside of the card, I used the Flower Pivot Panels as well as the Big Birthday Charms and Fast Food Charms to complete the birthday theme.  One of the Border Blends finishes off the inside


I'm sure the rest of the team had just as much fun with this challenge as I did.

Thursday, September 17, 2020

CCEE2038 Shaker Cards

Frances told the CCEE Stampers that September is "Shake Month," which is a day to celebrate all things Milkshakes!  One of the very first interactive cards she had created when she first started stamping over 30 years ago was a shaker card, so for our challenge this week, she asked us to incorporate some sort of shaker element on our card.  Bonus points if we include a milkshake!

No bonus points for me, I made a Christmas card, using some cute gingerbread kids from Paper Nest Dolls.


Check out the CCEE Stampers blog to see if anyone did, indeed, put a milkshake on her card.

Thursday, February 15, 2018

CCEE1807 - Tic Tac Toe

Kelly gave the CCEE Stampers a choice this week -- a Tic Tac Toe challenge.  We could actually choose what we wanted to do -- based on one line or column of the Tic Tac Toe form.

I chose the first column -- Add a sentiment, Shaker Card, Sequins.   It may still be pretty cold where you live, but it's rather nice in Florida, so I made a spring-like card.


Be sure to check out the CCEE Stampers blog to see what direction the rest of the team went.


Monday, May 15, 2017

Koala Shaker Card

CottageCutz recently released a whole batch of baby-related dies.  One of them is a cute koala, which I used on my shaker card today.


Supplies used on this card are:

Blue cardstock - 8 1/2" x 5 1/2", scored at 2 1/8" and 6 3/8"
Blue cardstock 4 1/4" x 4 1/4"
White cardstock approx. 3 3/4" x 3 1/2"
Patterned paper (2 panels) 1 7/8" x 5 1/4"
Scrap of patterned paper approx. 3 1/4" x 2"
White fun foam
Acetate
Copic markers (B0000, B60, BG32, BG34,Y21, and 100)
Ranger inks - Tea Dye and Antique Linen
Various sequins and seed beads
2 black mini brads
Liquid glue, foam pop dots, and tape runner
CottageCutz dies - Baby Koala w/ Blanket, Pierced Wide Circle Frame Set,  Double-Stitched Circle Set, Double-Stitched Oval Set

When I was thinking about what I wanted to do with this cute koala, I thought he would look cute framed in a shaker card.  To start the card, I cut the koala from white cardstock and sponged him with Tea Dye and Antique Linen ink.  The blanket and baby bottle were colored with Copic markers.


Then I cut the card base and shaker pieces.  I tried an experiment and instead of using foam tape to create my shaker box, I cut three layers of white fun foam with the Wide Circle Frame die. 


As an afterthought (and not shown), I decided that the koala would look better if he were sitting on a little rug.  So I cut another piece of patterned paper using an oval die.  I layered the three pieces of fun foam using liquid glue, glued the white circle to the bottom, and let it sit until the glue was dried.  At the same time I glued the blue frame to the acetate circle.   I adhered the two 1 7/8" x 5 1/4" panels of patterned paper to each side of the "gate."

After the glue had dried, I brushed the insides of the foam with some baby powder to make it less "sticky" (just in case some of the glue seeped out from between the layers and glued the shaker frame to the card base -- just on one side.


I constructed the koala using foam pop dots and glue.  It was at this point that I realized that he really should be sitting on a rug and cut one from another piece of patterned paper, which I glued to the inside of the acetate.


Then I poured the various sequins and seed beads into the shaker box and glued on the acetate circle.   I adhered the 4" x 5 1/4" piece of white cardstock to the inside of the card and stamped a sentiment (not shown).  I must admit that, even though I had rubbed the baby powder around the inside edge of the glued fun foam, I did get some errant sequins and beads stick to the sides.  I may have to rethink that in the future.


I did enjoy making this shaker card and hope you might give it a try.

CottageCutz dies used on my card are:

http://www.scrappingcottage.com/cottagecutzbabykoalawblanket.aspx

http://www.scrappingcottage.com/cottagecutzpiercedwidecircleframesetbasics.aspx


http://www.scrappingcottage.com/cottagecutzdouble-stitchedcirclesetbasics.aspx

http://www.scrappingcottage.com/cottagecutzdouble-stitchedovalsetbasics.aspx

Tuesday, August 23, 2016

MFP Stamp Shop Autumn Fun Blog Hop Day 1

Welcome to MFP  AUGUST Blog Hop
Autumn Fun

There are some changes to our Blog Hop, and  we hope you will be pleased with them. Be sure to look over the changes before hopping along.   Blog Hop guidelines can be found  HERE.   Commenting and doing the tutorials end sooner.
There will be prizes given for commenting and for doing the tutorials. Each winner will be chosen by Random.Org.   Large stamp set for commenting.  Mini stamp set for doing the tutorial,  and everyone doing the tutorials will  earn a Tutorial Badge. 
Now to the HOP!

Join us each day, Aug. 23 - 26, for some 
AUTUMN FUN!  Prize for Commenting is "BIG TREES."

Big Trees stamp set

You will have until Friday, 3pm CT, Aug. 26th to comment and do the tutorials.

Prizes and badge winners will be announced
on Sat. Aug. 27th. BLOG HOP GUIDELINES AND RULES FOUND HERE! (Be sure to read)
Tutorials
         1. Layered Embellishment by Gail  
2. Window Tent Card by Kren

Prize for doing one of the tutorials is the mini stamp set "From The Woods "


MFP Tutorial Badge awarded just for trying one of the tutorials.


NOW...
Let's get started HOPPING !!


As the title of this month's Blog Hop is Autumn Fun, I decided that I would do things that are fun for me -- techniques.  Each day I will have a card or two that use a different technique.  My first technique is a Shaker Card.

 To make my card, I stamped the image on the right side of a piece of white card stock, carefully cutting out the pumpkins.  Then I stamped the image again on a small scrap and formed the shaker box with foam tape around the pumpkins.  After brushing the sides of the foam tape with baby powder, I added the seed beads and covered the box with acetate.  Then I glued it to the under side of the larger piece of cardstock, lining up the images.  I put additional strips of foam tape around the edge of the card stock panel so that it would sit flat on the card base.

Here's a close-up of the shaker portion of my card.


The MFP Stamp Shop set that I used on this card is the Pumpkins and Sunflowers mini set.


Now it's time to visit the rest of the hop.   Here's the Design Team:

Lois (that's me)
Enjoy the Hop. Come back each day to be  inspired! Get to work on the tutorials and show  us what you make by Aug. 26, 3pm CT  and don't forget to be commenting! Come back to the MFP Stamp Shop Blog on Aug. 27th to see if you are a winner!!

Thursday, July 2, 2015

CCEE1527 - Happy Birthday, America

Lynn is our CCEE Stampers hostess for the month of July.  She says, "Saturday will be the birthday of America.  Make a card showing how you will celebrate the day (cook outs, parades, fireworks, or just at home reading a good book).  I'm really not sure exactly HOW I will be celebrating, but I do know there will be fireworks in the skies.  I made a shaker card with fireworks for the background.


Check out the CCEE Stampers Blog to see how the rest of the team will be celebrating.

Monday, May 18, 2015

Pretty Pink Posh/Card Maker Magazine Blog Hop

Hi, Friends.  Today I have a give-away to share with you.  Pretty Pink Posh is partnering with CardMaker Magazine in a blog hop and offering you a package of goodies.  Details of the giveaway are on the Pretty Pink Posh Blog.


Included in this giveaway package are the following items:

Stitched Borders 1 die cuts
Stitched Banner Duo 2 die cuts
6mm Sparkling Clear sequins
6mm Marigold sequins
6mm Espresso sequins
6mm Mossy Green sequins
6mm Pink Peonies sequins
Silver Confetti
Silver Star Confetti

Hopefully, you have come to my blog from Anita's blog.  If not, you may want to start at the beginning at the CardMaker Magazine Blog.

I've been playing with some wonderful toys from Pretty Pink Posh.  They make such pretty sequins, which seem to be the "trendy" embellishment of choice at the moment, as well as some unique dies.  I've used a bit of both on my cards today.  BTW, all of the images on my cards come from one stamp set, Lots of Words from MFP Stamp Shop.

My first card uses the pocket border die and some Sparkling Clear sequins.


With that pocket border die you don't have to add a tab to the card inserted into the pocket.  How clever is that!!!  Don't you love that stitched border across the top?

My second card is a relatively clean-and-simple get well card with some Watermelon sequins.


My third card is a shaker card.  The stitched banner die set includes both the banner and the square. You can cut them apart so that you can use them separately.   Or . . . if you don't want to have to do any measuring and plan always to use both of them, you can just leave them connected.   I used them both to make a shaker card, putting some 6mm Silver Confetti inside the shaker box.


The last stop of the hop is Pretty Pink Posh Blog.  Thanks for stopping by my blog today.

Saturday, December 11, 2010

Snowmen

The temperatures in Florida over the past several days -- and again what they will be early next week have not had the feeling of the South! I've made a few cards using this cute little snowman set from Mark's Finest Papers called Snowman Country. Now, Florida is not snowman country, but it's definitely been cold.

My first card was made for Speedy's Friends challenge to use paper piecing, which is a fun technique.


I cut a Labels Eleven shape several times -- once in blue and twice in white, ripping the white so that the layers would form snow drifts. I sponged on some Palette Ballet Blue to emphasize the layers of snow. Then I stamped the tree and snowman over the layers. After stamping them again I pieced them over top of the original images. The tree was actually stamped on some fern DP I had in my stash, but the ferns were the right shape for the tree. I stamped the snowman again on a piece of Basic Grey Wassail DP and cut out the hat brim, scarf and gloves -- then pieced them over the white snowman. I added some Polar White Flower Soft for the snow. Because the white Flower Soft works much better over white, I painted a little Copic Opaque white paint on the tree branches. The background DP on the card is from this year's DCWV Winter matstack.

Using the same papers and stamps, I made a card for this morning's Inspiration Challenge, the site for which was Shabby Apple.


When I was at StampFest last year, I found these wonderful little shaker card pouches -- no more foam tape! I used one of the round ones to make my card today, which was inspired by the color of this dress. I'm still making Christmas cards, so this one fits right in! When I stamped the snowman, I inadvertently used ivory cardstock instead of white, so I used some Copic White Opaque paint to add the snow on the ground and on the tree. I added some Flower Soft to "shake" around the snowglobe.
----------
I thought I would show you these wonderful salt and pepper shakers, which my best friend made about ten years ago, when she was making ceramics. She has since started rubber stamping, and I think the ceramics hobby has gone away.


Thanks for stopping by today.

Friday, August 28, 2009

Stampin'B's Challenge #21 - Acetate

I was the challenge hostess for this week’s Stampin’B’s Design Team, and my challenge was to use acetate (clear cardstock) on our cards. I had made a card a couple months ago with an acetate overlay on the front and was so pleased with how it looked that I wanted to do another one.

I stamped the larger lemon topiary tree from Flourishes Life, Love and Lemons set onto white cardstock and colored it with Prismacolor and Copic markers. After I cut it out using the Mega Curved Rectangular Nestabilities, I sponged the white panel with So Saffron ink before removing the die and then mounted it onto the Wild Wasabi panel. I had purchased a package of card bases and envelopes at Michaels, which make cards 5 x 6 ½ inches -- a really good size for many of the Flourishes stamps. Because of the larger size, you can see much of the So Saffron DSP. The clear cardstock overlay is attached at the back (a ¾ inch folded section) with red line tape. The lemon slices are glued to the clear cardstock. It’s difficult to see, but I used Crystal Effects on the lemon juice drops on the slices.
----
* Stamps - Life, Love and Lemons by Flourishes
* Paper - Flourishes Classic White, Wild Wasabi, So Saffron DSP, Flourishes Clear Cardstock
* Ink - Palette Noir Black, Versafine Black Onyx, So Saffron
* Accessories - Nestabilities, Copic and Prismacolor markers, Clear ep, Crystal Effects, Sponge dauber


I decided to make a second card for this challenge -- this one a bit more whimsical. My sister and I always make Halloween cards for the residents of the assisted living facility where my mom lives -- a total of 90 cards, so we have to start early. This week's video on Stamp TV was to make a shaker card. These are always fun. If you are unfamiliar with shaker cards, be sure to watch Gina K's tutorial.

I cut the frame using my Oval and Scallop Oval nestabilities and taped the acetate on the back of the opening. The sentiment in the frame is from Debbie Mumm's Harvest set, which includes both Halloween and Thanksgiving/Autumn stamps. I filled the opening with orange and dark brown micro beads, and popped on the back. The DP is from a pad of Debbie Mumm paper, which matches the stamps. I love this Hero Arts witch, and I've used her on many Halloween cards. The spider is new -- it's a dollar stamp from Michaels.
----
* Stamps - Harvest by Debbie Mumm, October by Hero Arts, Michaels $1 stamp
* Paper - Basic Black, Very Vanilla, Debbie Mumm Harvest & Holiday DP, Fourishes Clear Cardstock
* Ink - Palette Noir Black
* Accessories - Nestabilities, Prismacolor and Copic markers, Microbeads, Pop dots
-------
I hope the rest of the team had as much fun with this challenge as I did.