Saturday, October 28, 2017

Christmas Lantern

I can't believe that it's the end of October already!  Can Christmas be close behind?  I've got another Christmas card today, using a brand-new die from CottageCutz called Lantern with Pine Boughs.  Be sure to check it out, as well as all the dies in the latest release from CottageCutz.


Before I explain how I made my card, I want to let you know that CottageCutz/The Scrapping Cottage is sponsoring a video blog hop that started yesterday (Oct. 27) and continues today (Oct. 28).  Janet Axtman, one of the CottageCutz DT members, as well as several other video artists will be featuring cards made with CottageCutz dies . . . and there will be prizes!!!    Each one of the hop participants will be presenting prizes to visitors who comment on her blog, and CottageCutz/The Scrapping Cottage will be giving a grand prize.  So be sure to check it out!

To start my card, I cut all the pieces for the lantern from white cardstock, which had been backed with a Scor-Pal adhesive sheet.


I colored the pieces using Copic markers.


Then I cut my cardstock as follows:

White - 5 1/2" x 8 1/2", scored at 4 1/4"
Dark Green - 4" x 5 1/4"
Light Green patterned paper - 3 7/8" x 5 1/8"


After scoring the white cardstock at 4 1/4" and folding it in half, I glued the dark green cardstock onto it; and stamped the sentiment in the upper left-hand corner of the patterned paper.


I then embossed the patterned paper with a pine bough embossing folder and glued it down to the card base.


All that remained was to build the lantern in the lower right-hand corner of the card base.  I allowed some of the pieces to extend beyond the edge of the card for some additional interest.


The CottageCutz die used on this card is:

http://www.scrappingcottage.com/cottagecutzlanternwithpineboughs.aspx


Be sure to check out the CottageCutz website.  The new release has so many nice Christmas dies, both religious and secular . . . Nativity scenes and Santa Claus!  


Thursday, October 26, 2017

CCEE1743 - All About Cats

This is Frances' last week as hostess for the CCEE Stampers this month.  She tells us that tomorrow (the 27th) is Black Cat Day and Sunday (the 29th) is Cat Day.  So our challenge for this week should include a cat -- black or not.  I pulled out a couple of old MFP Halloween stamps to go along with a set of Sizzix dies I just bought to make my Halloween card.


Stop over at the CCEE Stampers blog for some more feline fun!

Monday, October 23, 2017

Christmas Tag Cards

For today's CottageCutz blog, I have created a project made with one of the new Christmas dies -- Christmas Tags.  BUT . . . instead of using the tags as they were intended, I thought it would be fun to make three small square cards with them.


First I cut the cardstock and patterned paper.  The card bases are 4 1/4" x 8 1/2", scored in half; and the patterned paper layers are 4" square.


I scored the cardstock in half and adhered the patterned paper to each one.


Then I cut the pieces using the Christmas Tags die.  The tags were cut from fun foam, and the small embellishment pieces were all cut from white cardstock and colored with markers -- except for the snowflakes, which were cut from silver paper.


To make adhering the small embellishment pieces easier, I ran them through my Xyron X sticker maker . . .


. . . then I constructed the tags.


Using the second largest Double-Stitched Circle die, I cut three colored circles, and using the second largest Nested Stitched Scallop Circle die, I cut three white circles.


All I had to do then was construct the circles, add foam dots to the undersides and adhere the tags.


I wanted to show that you can use dies for something other than their original purpose.  CottageCutz dies used on my cards are:

http://www.scrappingcottage.com/cottagecutzchristmastags.aspx


http://www.scrappingcottage.com/cottagecutzdouble-stitchedcirclesetbasics.aspx


http://www.scrappingcottage.com/cottagecutznestedstitchedscallopcircleset.aspx


Thursday, October 19, 2017

CCEE1742 - Acetate

This week Frances asked the CCEE Stampers to use acetate somewhere on our card.  I've been wanting to make a Magic Color Slider card again, so that's what I've got for you today.  I've got three photos of my card so you can see how the color magically appears when you pull the tab.


Stop over at the CCEE Stampers blog for more uses of acetate on your cards.


Monday, October 16, 2017

Autumn Blessings

Yesterday one of the challenges on Splitcoaststampers was entitled "Textures of Fall."  I was inspired by that challenge to make my CottageCutz card for today.  It combines all kinds of textures and texture techniques -- embossing, layering, sponging.


I started my card with the Pine Cone Branch die. Originally, I was going to cut it from white cardstock and color the various elements; but I decided that I wanted a bit more "texture."  So I cut it from both green and tan cardstock.  I thought that building up the pine sprigs (the green onto the tan) would give some more depth to them.


I then sponged Ranger Pine Needle ink onto the green die-cut and Vintage Photo ink on the tan one.


Then I cut the pine sprigs off the green die cut and glued them to the tan one . . .


. . . and added the additional pinecones and pine sprigs.


Once the tedious part was complete, I cut my cardstock.  

Dark Gold - 5 1/2" x 8 1/2", scored at 4 1/4"
Cream - 4" x 5 1/4"
Scrap of Dark Gold large enough for the focal panel


I have a Darice embossing folder of fall foliage.  I took some Ranger Distress ink (Dried Marigold, Fired Brick, Rusty Hinge, Vintage Photo) and rubbed various parts of the embossing folder.


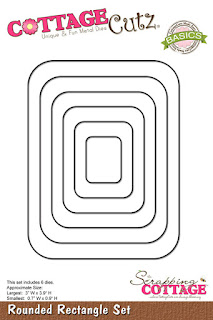
When I embossed the cream cardstock, the ink gave the embossing some nice fall coloring, and then I cut the focal panel with the largest Rounded Rectangle die.


I constructed my card base, using Scor-Tape to hold down the embossed panel and large foam pop dots to add the rectangle.  I had stamped the word "Autumn" in the Pine Needle ink at the lower right-hand corner of the dark gold panel and die-cut the word "blessings" using one of the Expressions Plus dies.


I then added my constructed pine bough, and my card was finished.


CottageCutz dies used on this card are:

http://www.scrappingcottage.com/cottagecutzpineconebranch4x6.aspx

http://www.scrappingcottage.com/cottagecutzroundedrectanglesetbasics.aspx

http://www.scrappingcottage.com/cottagecutzexpressionsplusblessingsphrase.aspx


Don't forget that CottageCutz has lots of new Halloween and Christmas dies on their website.  Be sure to check them out!

Thursday, October 12, 2017

CCEE1741 - "Old Farmers Day"

Frances continues as hostess for the CCEE Stampers, and this week we are again celebrating an unusual holiday -- Old Farmers Day.  Frances aaked us to show our appreciation to our farmers by creating something farm-related today.  I pulled out two CottageCutz stamp/die sets for my step card.


Check out some more rural life over at the CCEE Stampers blog.

Monday, October 9, 2017

Refrigerator Magnets

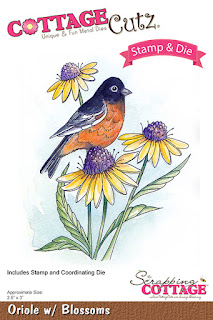
Today I have a different type of project for you.  I used a couple of the new CottageCutz bird die/stamp combos to make some refrigerator magnets.  They were really simple and quite fun using the stamps, dies, and my Xyron sticker maker -- with the laminating/magnet cartridge.


First I stamped the images onto 110# white cardstock.  I thought the heavier cardstock would be more sturdy in the final project.


Then, closely following the photos on the packaging, I colored both birds with my Copic markers.


I cut them out using the dies included with the set.


I had bought the laminating/magnet cartridge for my Xyron 510 sticker maker some time ago and just recently pulled it out for another project.    I inserted my die-cut bird images into the machine . . .


. . . cranked the handle, and out they came.


I fussy cut them with small scissors, leaving a narrow border of magnet material showing.


And my project was complete.


I just wanted to show that you can do more with these stamps and dies than just make a fun card.  I hope you give this a try!

CottageCutz products used on my refrigerator magnets are:

http://www.scrappingcottage.com/cottagecutzoriolewblossomsstampanddie.aspx

http://www.scrappingcottage.com/cottagecutzbluejayandappleblossomstampanddie.aspx


Thursday, October 5, 2017

CCEE1740 - "Balloons Around the World Day"

Frances is hostess for the CCEE Stampers this month, and for her first challenge she asked us to help celebrate "Balloons Around the World Day" today.  Don't you just love the sentiment on my card?  Oh, how I wish it were true!!!


Stop over at the CCEE Stampers blog to see some more fun balloons!

Monday, October 2, 2017

Bluebird and Morning Glories

CottageCutz has a new stamp/die series of birds, which are now available on their website, along with new Halloween and Christmas dies.  Be sure to visit the store and see what they have to offer.  My card today was made using the Bluebird and Morning Glories stamp and die set.


Like Mary Marsh has done so many times, I started creating my card using a Sketch Challenge layout from Splitcoaststampers.  This sketch was from several weeks ago.


Sometimes with brand-new stamps you have a little difficulty getting the ink to stamp evenly on the first go-round.  One of the reasons I love the MISTI is that you can re-stamp an image several times until you're happy with the result.


After getting a good stamped image, I colored the bluebird and morning glories with my Copic markers.  I like to do my coloring while the image is still in the MISTI in case I need to restamp the image after I'm finished.


I then die cut the image and also cut an oval, using the largest Nested Stitched Eyelet Oval die.


Then I cut my cardstock.  The card base is heavyweight white cut at 5 1/2" x 8 1/2", scored at 4 1/4", and the patterned paper is cut at 4" x 5 1/4".  I liked this patterned paper because it picked up several of the different shades of blue from my bluebird.


I then started the construction of my card, adhering the patterned paper directly on the card base but popping the die-cut bluebird on large foam pop dots.


I stamped my sentiment on the edge of the same pale aqua cardstock as my oval and, using a scrap of white cardstock, stamped one of the morning glories, which I colored and fussy cut.


I then adhered the sentiment panel flush with the left side of the card below the oval and popped up the morning glory on a foam pop dot at the end of the strip (where the heart appeared on the original sketch).  And I was finished!


I hope you check out all the new items in the CottageCutz store.   The holidays are just around the corner!!!

CottageCutz dies used on my card are:

http://www.scrappingcottage.com/cottagecutzbluebirdandmorninggloriesstampanddie.aspx


http://www.scrappingcottage.com/cottagecutznestedstitchedeyeletovalset.aspx