

To start my card I cut cardstock and patterned paper as follows:
Black - 8 1/2" x 5 1/2", scored at 4 1/4"
White - 4" x 5 1/4"
Patterned paper - 3" x 4 1/2"

One of my favorite embossing techniques is to ink up the embossing folder before placing the cardstock inside. This Sizzix Bricked folder always works so well with this technique. I inked it up with gray ink, inserted the white cardstock, and ran it through my Cuttlebug. When you use a dye-based ink (such as Memento), the folder rinses clean under the faucet.

Next I die-cut the pieces from the coordinating dies, placing them on my sticky board to keep the small pieces from getting lost.

Using ink or markers, I added some texture to various die-cut pieces.

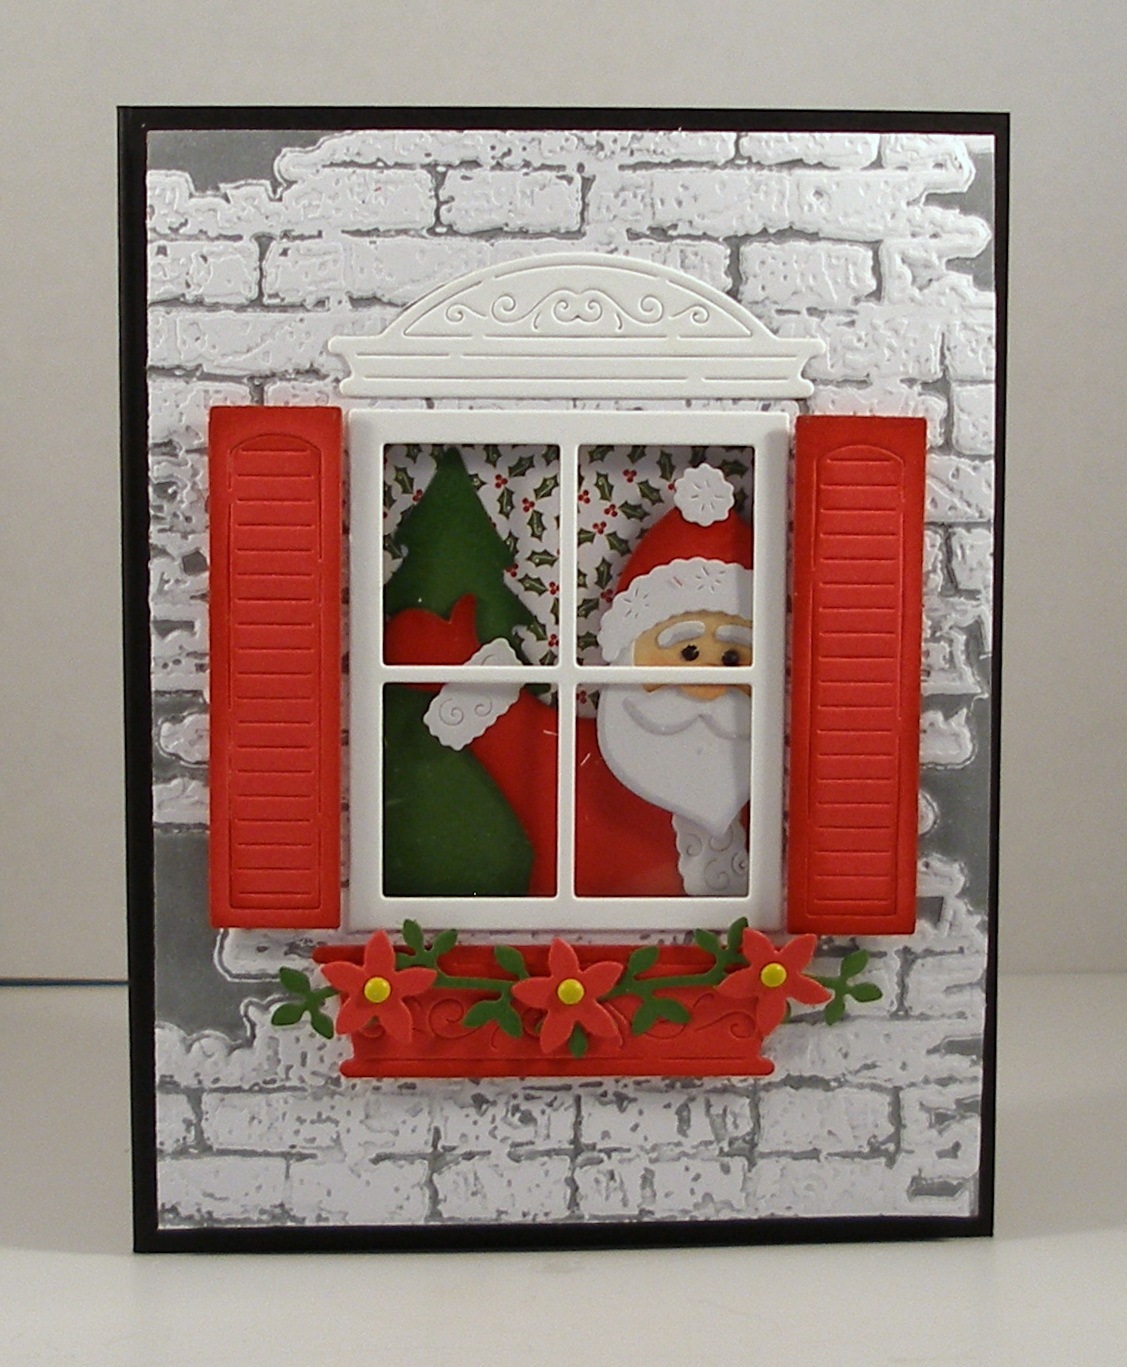
I wanted a window in my brick wall, so I laid the die-cut window in the center of the panel and drew inside the panes. Then, using an Exacto knife, I cut the opening just outside the lines that I had drawn.

This photo shows the opening.

I placed some Scor-Tape around the perimeter of the window and cut a piece of acetate slightly larger than the opening . . .

. . . and, removing the protective paper from the Scor-Tape, I carefully placed the acetate over the opening.

I then glued the patterned paper in the center of the black card base.

I decorated the front of the card, gluing down the window frame and cornice and adhering the shutters and window box with foam pop dots. After gluing the three flowers to the garland, I pierced the centers and added a yellow mini brad to the center of each. I then glued the whole garland to the window box.

Before attaching the front of the card to the base, I had to construct Santa. I used the illustration on the front of the packaging as a guide. His head is attached with foam pop dots, which made it easy to place him on the front -- leaving his arm not glued down. I then slipped the tree (on which I had applied some liquid glue) under his arm and pressed it down to hold it firm. I had lined him up so that he would show through the window.

Because I had used pop dots on Santa's head, I needed to use thicker pop dots on the brick card front so that there was a bit of room between Santa and the window sheet.

I attached the brick card front so that Santa and the tree showed through the window -- and I was finished.
Be sure to check out all the wonderful Christmas dies on the CottageCutz website. Dies used on this card are:


No comments:
Post a Comment