Monday, December 25, 2017

Happy Bee-Day!

Merry Christmas!  I hope you are enjoying your day with family and friends.  I'm happy you took a little time out of this special day to check out my card, which is made with several CottageCutz dies.  The stamp/die combos that were released last spring will be ON SALE right after Christmas, so I thought it would be appropriate to use one of them today.  Be sure to check out the CottageCutz store for the sale.

The focal image of my relatively simple birthday card is Bumblebee Chloe.


To start my card, I stamped Chloe onto some white cardstock . . .


. . . and colored her with Copic markers.  I used a clear Wink of Stella brush on both her wings and the wings of the little bee buzzing around the daisy.


I then die-cut her out using the coordinating framelit die.


I cut out the card base and circle elements as follows:

Card base - heavyweight black 5 1/2" x 8 1/2"
Patterned paper - 5 1/4" x 4"
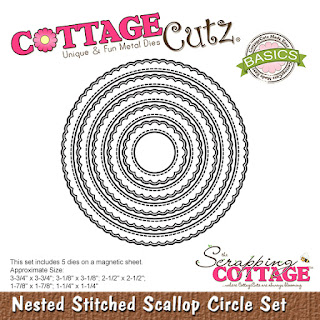
Black circle - largest Stitched Scallop circle
White circle - 2nd largest Double-stitched circle


Using Versafine Onyx Black ink, I stamped the sentiment on the patterned paper and embossed it with clear embossing powder.


I then scored the black card base at 4 1/4" and constructed my card, adding a strip of black and white ribbon behind the layered circles.


I adhered three large foam pop dots to the back of my die-cut of Chloe . . .


. . . and placed her in the center of the circle.  And my card was complete.


CottageCutz dies used on my card are;

http://www.scrappingcottage.com/cottagecutzbumblebeechloestampanddie.aspx

http://www.scrappingcottage.com/cottagecutznestedstitchedscallopcircleset.aspx

http://www.scrappingcottage.com/cottagecutzdouble-stitchedcirclesetbasics.aspx


Don't forget to check out the After Christmas Sale on the CottageCutz website starting tomorrow, December 26.

Monday, December 18, 2017

Feel Better Bear

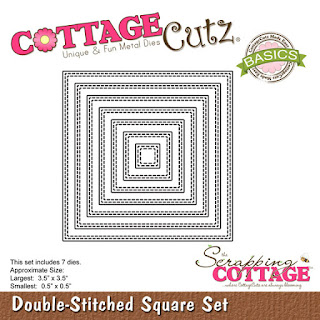
CottageCutz recently released a whole bunch of "Get Well" dies for your pleasure.  And they feature some really cute images.  I'm using several of these dies on my card today.  Again, I've made something other than an A2 card -- it's a Z Box Fold card, using both Bear Patient die and the Ouch with Tooth die, as well as a Double-Stitched Square die.


As I wasn't sure which of the images from the Bear Patient die I was eventually going to use, I cut all the pieces out of white cardstock so that I could color them.  I knew I was only going to use one sentiment from the Ouch with Tooth die, so I just cut it out of red cardstock.


Using various Copic markers and a couple of Wink of Stella brushes, I colored the bear pieces and constructed the various images.


I then cut the cardstock for the base of my card -- a 4 1/4" x 5 1/2" piece of dark brown and a 9 3/4" x 4" piece of kraft.


I scored the long piece at 5 1/4".   With the short edge of this piece at the top of my paper cutter and the long edge at the 1" mark, I cut a slit from the 3" mark to the 7 1/2" mark.   IMPORTANT:  If you decide to make a similar card, be sure that the larger section of the cardstock strip is at the top before you cut the slit.  (Ask me what happens when you don't place it in your paper cutter the correct way!)


I placed the strip on my Scor-Pal with the long edge across the top and the larger section toward the left.  I then scored at the 3" mark down to the slit.  At the end of the slit (at the 7 1/2" mark), I scored down to the edge.  (I slightly folded on the score lines so that you can see them.)


Fold on the score lines to make the "box."


Apply Scor-Tape to the back of the 4 3/4" x 4" section, as shown.


Now it was time to cut the background panels of the card.  I wanted to use the Double-Stitched Squares and Rectangles on my card, but the rectangles weren't quite the right size.  So I just cut the front panel with the die and the rest of the panels as listed:

Cream cardstock - 2 1/2" Double-Stitched Square, 4" x 2 1/2" rectangle
Dark brown cardstock - 2 3/4" square, 4 1/4" x 2 3/4" rectangle, 3/4" x 5" strip, and (2) 3/4" x 2" strips
Patterned paper - 1/2" x 4 3/4" strip and (2) 1/2" x 1 3/4" strips


I layered the panels and adhered them to the front of the card.


I then glued the die cuts to the front and inside panels . . .


. . . removed the protective covering from the Scor-Tape and glued the back panel to the dark brown card base, carefully centering it.


And my card was complete.


CottageCutz dies used on my card are:

http://www.scrappingcottage.com/cottagecutzbearpatient.aspx

http://www.scrappingcottage.com/cottagecutzouchwithtooth.aspx


http://www.scrappingcottage.com/cottagecutzdouble-stitchedsquaresetbasics.aspx


Thursday, December 14, 2017

CCEE1750 - Favorite Holiday Stamps

Maryann continues as hostess for the CCEE Stampers for our final challenge of 2017.  She said: "Let's keep things simple for our final challenge for the year. Use your favorite holiday stamps to create a card."  This may not be my favorite holiday stamp, but it definitely is my favorite Santa stamp.  I think that's the most beautiful Santa face I've seen.


Check out the CCEE Stampers blog to see some more favorites!  The CCEE Stampers are taking the rest of the year off to spend time with our families and friends.  We hope you'll join us again in January for more challenges and fun!

Monday, December 11, 2017

Nativity Easel Card

Even though Christmas is just a few weeks away, I'm still making Christmas cards.  As you probably are aware, I like to make fun-fold cards.  A particularly easy one is an easel card, and I have just that for you today.


I wanted to use navy as the card base, but I don't have any heavyweight navy cardstock; so I used heavyweight white as the base and just used the navy as a mat layer behind this really pretty marbleized pattern paper.  I cut two pieces of white -- 4 1/4" x 8 1/2" and 4 1/4" x 4 1/4"; two pieces of navy - 4" x 4"; and two pieces of patterned paper 3 7/8" x 3 7/8".


I scored the larger white piece on the long edge at 2 1/8" and 4 1/4" . . .


. . . and folded on the score lines.


I then layered the two square panels -- one with white/navy/patterned paper and the other with just the navy/patterned paper.


It's important to use a strong adhesive to hold this panel onto the easel, so I placed three strips of Scor-Tape on the final small section of the easel . . .


. . . and adhered the square front panel.


I then cut my die-cuts from navy, silver and a scrap of red.  You'll notice that I cut several layers of the sentiment.  As the sentiment is going to act as the "bumper" for my easel, it needed to be thick.  The navy cardstock is quite thin (65#), and I actually have five layers there -- two of the Merry Christmas sentiments are double thickness.


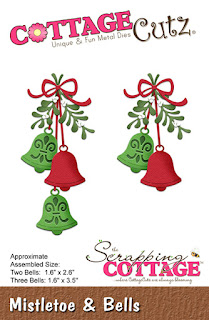
Using a fine-tip bottle of liquid glue, I adhered the Nativity scene, bells and bows to the front of the card.  As you can see, I cut down the "hangers" for the bells.


After gluing all the layers of Merry Christmas together, I glued the sentiment to the inside.  Just an FYI, the die I used for this sentiment actually says "We Wish You a Merry Christmas," but I cut out just the "Merry Christmas" portion.


Here again is my completed card.


CottageCutz dies used on my card are:


http://www.scrappingcottage.com/cottagecutzwewishyouamerrychristmaselites.aspx


http://www.scrappingcottage.com/cottagecutzmistletoeandbells.aspx


Thursday, December 7, 2017

CCEE1749 - Christmas Carols

Maryann is our CCEE Hostess for December.  She reminded us that we all love Christmas carols at this time of year and asked us to make a card inspired by any Christmas carol.  While it's not an old traditional Christmas carol, I always liked The Little Drummer Boy.


I invite you to visit the CCEE Stampers Blog to see if you recognize the Christmas carols which inspired the rest of the team.

Tuesday, December 5, 2017

Santa Scene Luminary

Last week I posted a photo of a luminary on Facebook that I had made using a CottageCutz Santa Village Scene, some white cardstock and vellum.  Several people asked me if there were instructions somewhere, and I had to admit that I had made it up as I went along.  I promised to make another one, take photos along the way, and write out the instructions.  Here is the one I just made.


For the outside of the luminary I cut the heavyweight white cardstock as follows:

1 piece - 4 1/4" x 10 1/2"
4 strips - (2) 1/8" x 4 1/4" and (2) 1/8" x 5 1/4"

And a piece of vellum 4 1/4" x 5 1/4"


I scored the long white piece at 1/8", 2 5/8", 7 7/8", and 10 3/8".


I folded on the score lines and burnished the fold lines to that they were very crisp.


Then I applied liquid glue to the back of the die cut . . .


. . . and centered it onto the vellum panel.


The 1/8" strips were then glued to the back of the vellum piece on all four sides.


Now came the tricky part.  I applied some liquid glue to the small 1/8" tabs on the luminary base and attached the vellum piece to each side.


As the glue was drying, I cut the panels to be applied to the outside of the luminary.

Blue - 5" x 4", (2) 2 1/4" x 4"
Patterned paper - 4 3/4" x 3 3/4", (2) 2" x 3 3/4"


I layered the patterned paper onto the blue strips and glued them to the outside of the luminary.


I found a package of four large tea lights in Michaels.  The best part about them is that the light can either flicker (one color) or change colors, depending which way you push the switch.


Thanks for stopping by today.  I hope you try one of these luminaries for your holiday décor!