Showing posts with label Pinspired. Show all posts

Saturday, April 25, 2020

Scor-Pal Pinspired Project - Exploding Box

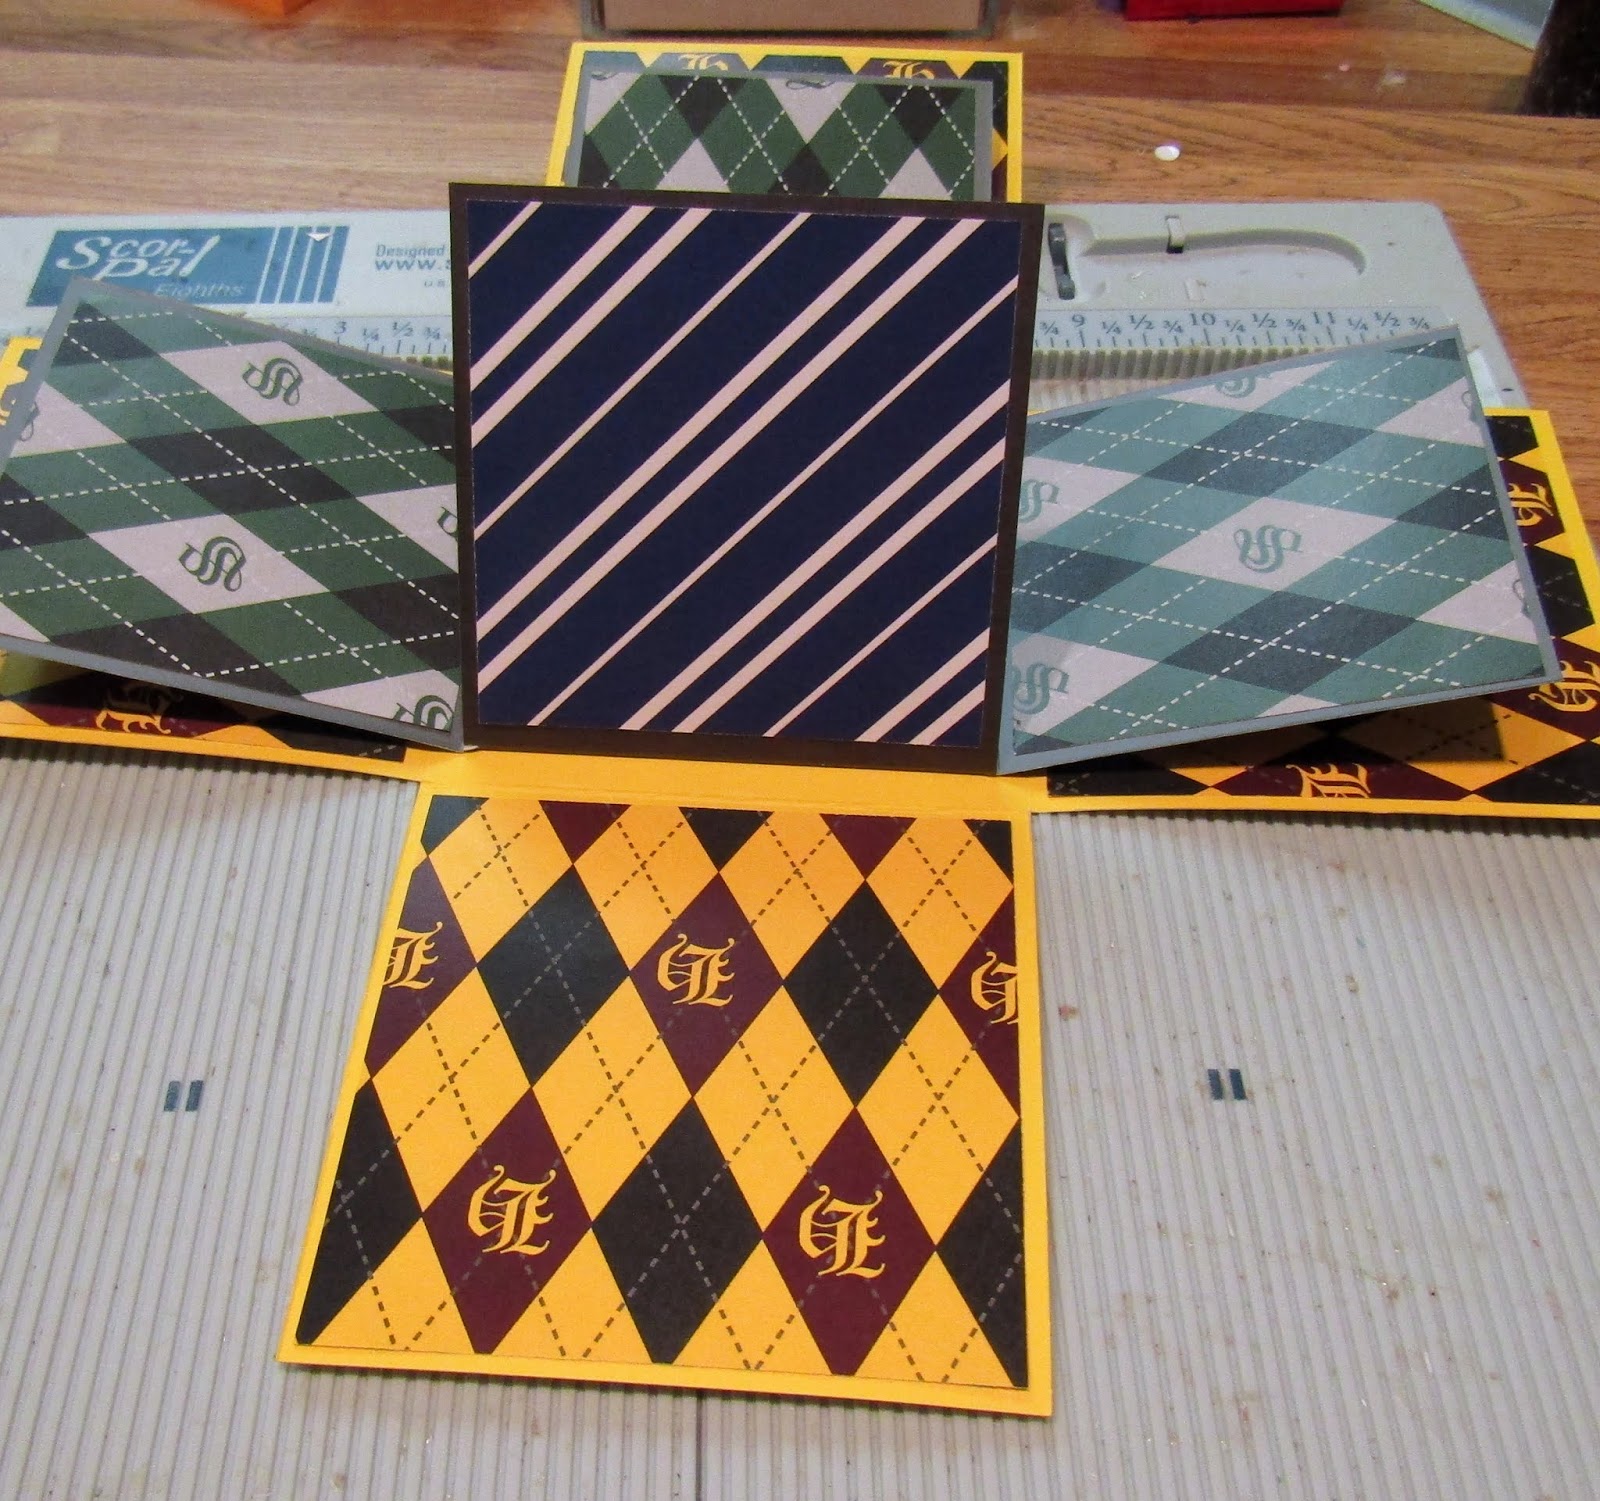
I've got a project on my blog today that was inspired by another project from the Scor-Pal Pinterest Board -- an Exploding Box from 2006.

When I started my box, I decided that my theme would be a favorite of mine -- a certain boy wizard and his friends.  My box differs from the original in that there are only two layers of explosion rather than three, and also there is a 3-D object on the inside.


To start my project, I scored a piece of 12" x 12" cardstock at 4" and 8" on both sides . . .


. . . and a piece of 10 1/2" x 10 1/2" cardstock at 3 1/2" and 7" on both sides.


I then cut the four corners out of each piece.


I chose some wizard-related patterned paper and cut eight pieces 3 3/4" square and eight pieces 3 1/4" square.  As you can see, the patterns represent all four houses at the magic school.


Scor-tape is attached to the bottom of the center square of the smaller panel, the pieces are glued together, and the patterned paper applied appropriately.


The next step was to make the lids for the two layers.  The larger lid is made from a piece of matching yellow cardstock 6 5/8" square.  The smaller lid is made from a piece of matching dark gray cardstock 6 1/8" square.  I then scored each piece 1 1/4" in from all four sides.


After cutting tabs on all four corners, I added some Scor-tape.


This was done to both the yellow lid and the dark gray lid.

I then stamped and colored the images (4 teachers and 4 students).  I cut them out with a Spellbinders Labels One die with a slightly larger Labels One die for the matting.


Following the video instructions for the Karen Burniston Castle Pop-up, which you can find on her website here, adding the additional trimwork.


After the castle was completed, I attached it to a 3 3/4" square of patterned paper, using the tabs created with one of the dies in the Castle Pop-Up die set.  I then cut a hexagonal piece of the same patterned paper, inserted the free-standing turret, and glue it inside the castle.


As you can see from the photos, the teachers are glued to the first layer of explosion. . .


. . . and the students are glued to the inside layer.


I hope you enjoyed my tutorial and will try to make an Explosion Box yourself.  It was a really fun project.

Saturday, May 25, 2019

Scor-Pal Pinspired Calendar

Each month one of the members of the Scor-Pal design team looks back at Scor-Pal's Pinterest page and recreates a project, using their own design.  This month is my turn.  As I looked through the Pinterest page, I came across this fun project -- an Easel Calendar card, made by Virginia Nebel.


Many of my friends are avid Harry Potter fans (as am I), and I thought it might be fun to recreate Virginia's project with a Harry Potter-inspired one.


To start my card I scored an 11" x 8 1/2"  piece of red 110-pound cardstock at 5 1/2" and 8 1/4".


I then Z-folded at the score lines.


After adding strips of Scor-Tape to the last panel . . .


. . . I adhered a 5 1/2" x 8 1/2" panel to the front.


I cut a yellow mat panel 5 1/4" x 8 1/4" and some Harry Potter-themed pattern paper slightly smaller . . .


. . . and adhered them to the card base.


Using images from Kindred Stamps' Students of Magic stamp set and patterned paper, I created a little scene -- adding a small calendar to a black banner.  The "Platform 9 3/4" was stamped with some Just Rite letters and numbers, and the sentiment was computer-generated.


I then adhered this completed scene to the easel front and added the owl "bumper," which holds the easel open.  I used large foam pop-dots to adhere the "bumper."


Here is a side view of the easel.


It's always fun to find a project you like and make it your own by changing the theme or the colors or the images.

Tuesday, September 25, 2018

Scor-Pal Pinspired Project - One-Sheet Box

The Scor-Pal is the perfect tool for making a box -- one-sheet or otherwise.  My pinspired project for today was inspired by this One-Sheet Box made by Einet Kessler:


This is my version of Einet's box:


Her instructions were very clear, and I had no trouble following them:

To start, score a piece of double-sided 12" x 12" cardstock at 3" and 9".  Turn the sheet a quarter of a turn, and score at 3", 5 1/2", 8 1/2" and 11".


With the four score lines horizontal, cut out the top left and right corners -- down to the second score line, as shown (the sections with the Xs should be removed).


Cut along the four outer corner squares from the edge to the score lines, to create the four tabs.  Fold at the score lines.  It might be a good idea to fold on all the score lines to get crisp edges.


Adhere Scor-Tape to the center panels, as shown in the photo, and fold in the side tabs.


Remove the paper from the tape, and adhere the center panels to the folded in flaps.


At this point, your box is completed.  You may decorate it any way you wish.  I just added some candy to the inside, folded over the lid, and added a wide wired ribbon.


You could make this cute little box fit any occasion, simply by changing the cardstock.  Here's a Halloween version . . .


. . . and a Christmas version.


You could probably make one in about 15 minutes.  I hope you give it a try!

Thursday, November 23, 2017

CCEE1747 - "Pinspired" Cascading Card

Joanne Grzelak continues as hostess for the CCEE Stampers this week and asked us to make a Christmas or New Year's card for our stash.  I decided to combine this challenge with this month's Scor-Pal "Pinspired" card.

You can get so much inspiration perusing the photos on Pinterest.  The Scor-Pal design team has an on-going project, in which we find a card on Pinterest and use it as inspiration for a new card.  That's what I have done today.  I chose this Cascading Card by Chris Peterson as my inspiration.  It originally appeared on her blog, the Calla Lily Studio Blog.   As Christmas is right around the corner, I changed Chris's very feminine card into a Christmas Card.


To make this card, you start with a piece of cardstock 8" x 12".  On the 8" side, mark 5 1/2" on one end and 2 1/2" on the other; then cut the paper on the diagonal.   Unless your cutter is big enough, it is easier to cut it with an Exacto knife and a metal ruler, which is what I did.  I found that anchoring the cardstock with a couple pieces of washi tape kept it from sliding during the cutting process.


Score each piece at 4" and 8".


Measure up 2 3/4" from the bottom of the taller end and make a mark.  Measure up 1 1/4" from the bottom of the shorter end and make a mark.  Draw a line between the two marks.


On one piece of cardstock, cut DOWN to the pencil line at 2" and 10" -- and cut UP to the pencil line at 6".  On the other piece of cardstock, cut UP to the pencil line at 2" and 10" -- and cut DOWN to the pencil line at 6".


Erase the pencil lines.   Stack the two pieces together and slot them together by sliding the cut lines over one another.  I found it easier if you slotted the two center cut lines first and then maneuvered the cardstock and slotted the end cut lines.  Fold OUT at the score lines to form the cascade.  Using a bone folder, give the edges a sharp score.


You can then decorate the card as you wish.  I cut pieces of patterned paper to cover the side sections, as follows:

Front panel - 2 3/4" x 3 3/4" - fold in half and cut the top diagonally from the center to 2 1/4" on each side.

Six panels 1 3/4" wide, cut as follows:
2 panels 3 1/8" high
2 panels 4 1/4" high
2 panels 5 3/8" high

Each panel is then trimmed diagonally by 1/4" from the outside to the inside, as shown in the photo.


I then made two inserts, using die cuts and patterned paper.  They are 3 7/8" wide and can be as short or tall as you prefer.  These will slip inside the two open sections of the card.


Here is a photo of the card and the inserts.


I hope you give this fun technique a try.  And be sure to check out our Scor-Pal Scoring Projects and Ideas on Pinterest.

If you'd like to see some more holiday cards, check out the CCEE Stampers blog.