When I saw the new dies in the new Karen Burniston release, I fell in love with the Pine Cone set.
Friday, November 21, 2025
Karen Burniston New Release Sneak Peeks -- Day 3
Tuesday, December 5, 2023
Karen Burniston Designer Challenge -- Naughty or Nice
This month's Karen Burniston Designer Challenge is titled "Naughty or Nice?" We were to make a Christmas card incorporating a stocking. I decided to use the Fireplace Pop-Up and Fireplace Extras 1, which includes stockings.
About 10 years ago I saw a card by Grace Nywening which she called a Center Easel Card. I thought it was such a clever take on the easel card that I printed out her blog post so I would have the instructions. This month's challenge was perfect for this type of card. The Fireplace Pop-Up fit perfectly in the easel section . . .
. . . and the "Merry Christmas" was the perfect "bumper" to hold the card open.
I'm so glad I hung onto those instructions.
Sunday, May 1, 2022
Scor-Pal "More Than One Score"
I recently participated in an on-line card class, and one of the cards we made was a split easel card. I thought I would make another one for our May "More than One Score" challenge. A split easel card is basically the same as a regular easel card, except that the "easel" does not go all the way across the base.
Check out the Scor-Pal blog for some more "more than one score" inspiration.
Friday, April 1, 2022
Scor-Pal "More Than One Score" Challenge
It's time for the Scor-Pal "More than One Score" challenge again. As Easter is this month, I thought an Easter card would be appropriate. I haven't made an easel card in quite a while, so I thought that would be fun. In addition to the two scores required for the card base, I also scored the crease lines on the ribbon.
. . . as is the Happy Easter sentiment inside.
Saturday, October 17, 2020
C4C557 Sketch Challenge - Circle Card
A good technique for this sketch is a Circle Easel Card. My card was made using several Karen Burniston dies (Crosshatch Circles and Triple Flip).
Check out the Crazy4Challenges blog to see how the rest of the team handled this sketch.
Thursday, March 19, 2020
CCEE2012 - Wedding/Anniversary/Celebration
I chose a wedding card and made it a round easel. My "one other color" is the flesh color of the bride and groom. I don't have any weddings coming up on my calendar, but I'll be ready when I need one!
Check out the CCEE Stampers blog to see what kind of cards my fellow team members chose to make.
Thursday, October 10, 2019
CCEE1941 World Rainforest Week
One of the trendy images right now is the sloth -- definitely a rainforest inhabitant.
Saturday, May 25, 2019
Scor-Pal Pinspired Calendar
Many of my friends are avid Harry Potter fans (as am I), and I thought it might be fun to recreate Virginia's project with a Harry Potter-inspired one.
To start my card I scored an 11" x 8 1/2" piece of red 110-pound cardstock at 5 1/2" and 8 1/4".
I then Z-folded at the score lines.
After adding strips of Scor-Tape to the last panel . . .
I cut a yellow mat panel 5 1/4" x 8 1/4" and some Harry Potter-themed pattern paper slightly smaller . . .
. . . and adhered them to the card base.
Using images from Kindred Stamps' Students of Magic stamp set and patterned paper, I created a little scene -- adding a small calendar to a black banner. The "Platform 9 3/4" was stamped with some Just Rite letters and numbers, and the sentiment was computer-generated.
I then adhered this completed scene to the easel front and added the owl "bumper," which holds the easel open. I used large foam pop-dots to adhere the "bumper."
Here is a side view of the easel.
Thursday, April 25, 2019
New Kindred Stamps Release - Forest Elves
My first card centers around the beautiful, ageless royal elf. I used two different stencils on this card. The gold stars on the navy background was done by using some gold embossing paste; the sunburst on the card base was achieved with sponging some Ranger Fossilized Amber distress ink. Because I didn't want to run the navy cardstock through my die-cutting machine for fear of smashing the gold stars, I instead cut the circle from the card base and mounted the entire navy panel on the inside. I then just cut the gold circle and glued it onto the front.
The royal elf is popped up on foam squares. After I colored her with Copic markers, I added some clear Wink of Stella to her clothing. Hopefully, you can see the shimmer.
My second card is an easel card -- with a little bit of a twist. To go along with the sentiment "you have my bow and my heart," I made the easel from a heart. I sponged the background trees using Ranger Mowed Lawn distress ink and the Kindred Stamps Forest Stencil, adding some grass patterned paper at the bottom. I colored the two forest elves with Copic markers, cut them out, and placed them strategically on the heart. I added a couple of die-cuts to the sentiment panel.
I had so much fun with my third card. I recently purchased a Lawn Fawn Magic Picture Changer die and thought it would work well with the two forest elves. When you pull the tab on the right-hand side of the card, the picture inside the frame changes.
I recently bought a camera with video capabilities, and I think I've figured out the process. You can see how the picture changes in this short video.
Thursday, April 11, 2019
CCEE1915 Drop Everything and Read Day
Be sure to check out the CCEE Stampers blog to see what books inspired the rest of the team this week.
Friday, February 8, 2019
Boldy Celebrate Your Birthday
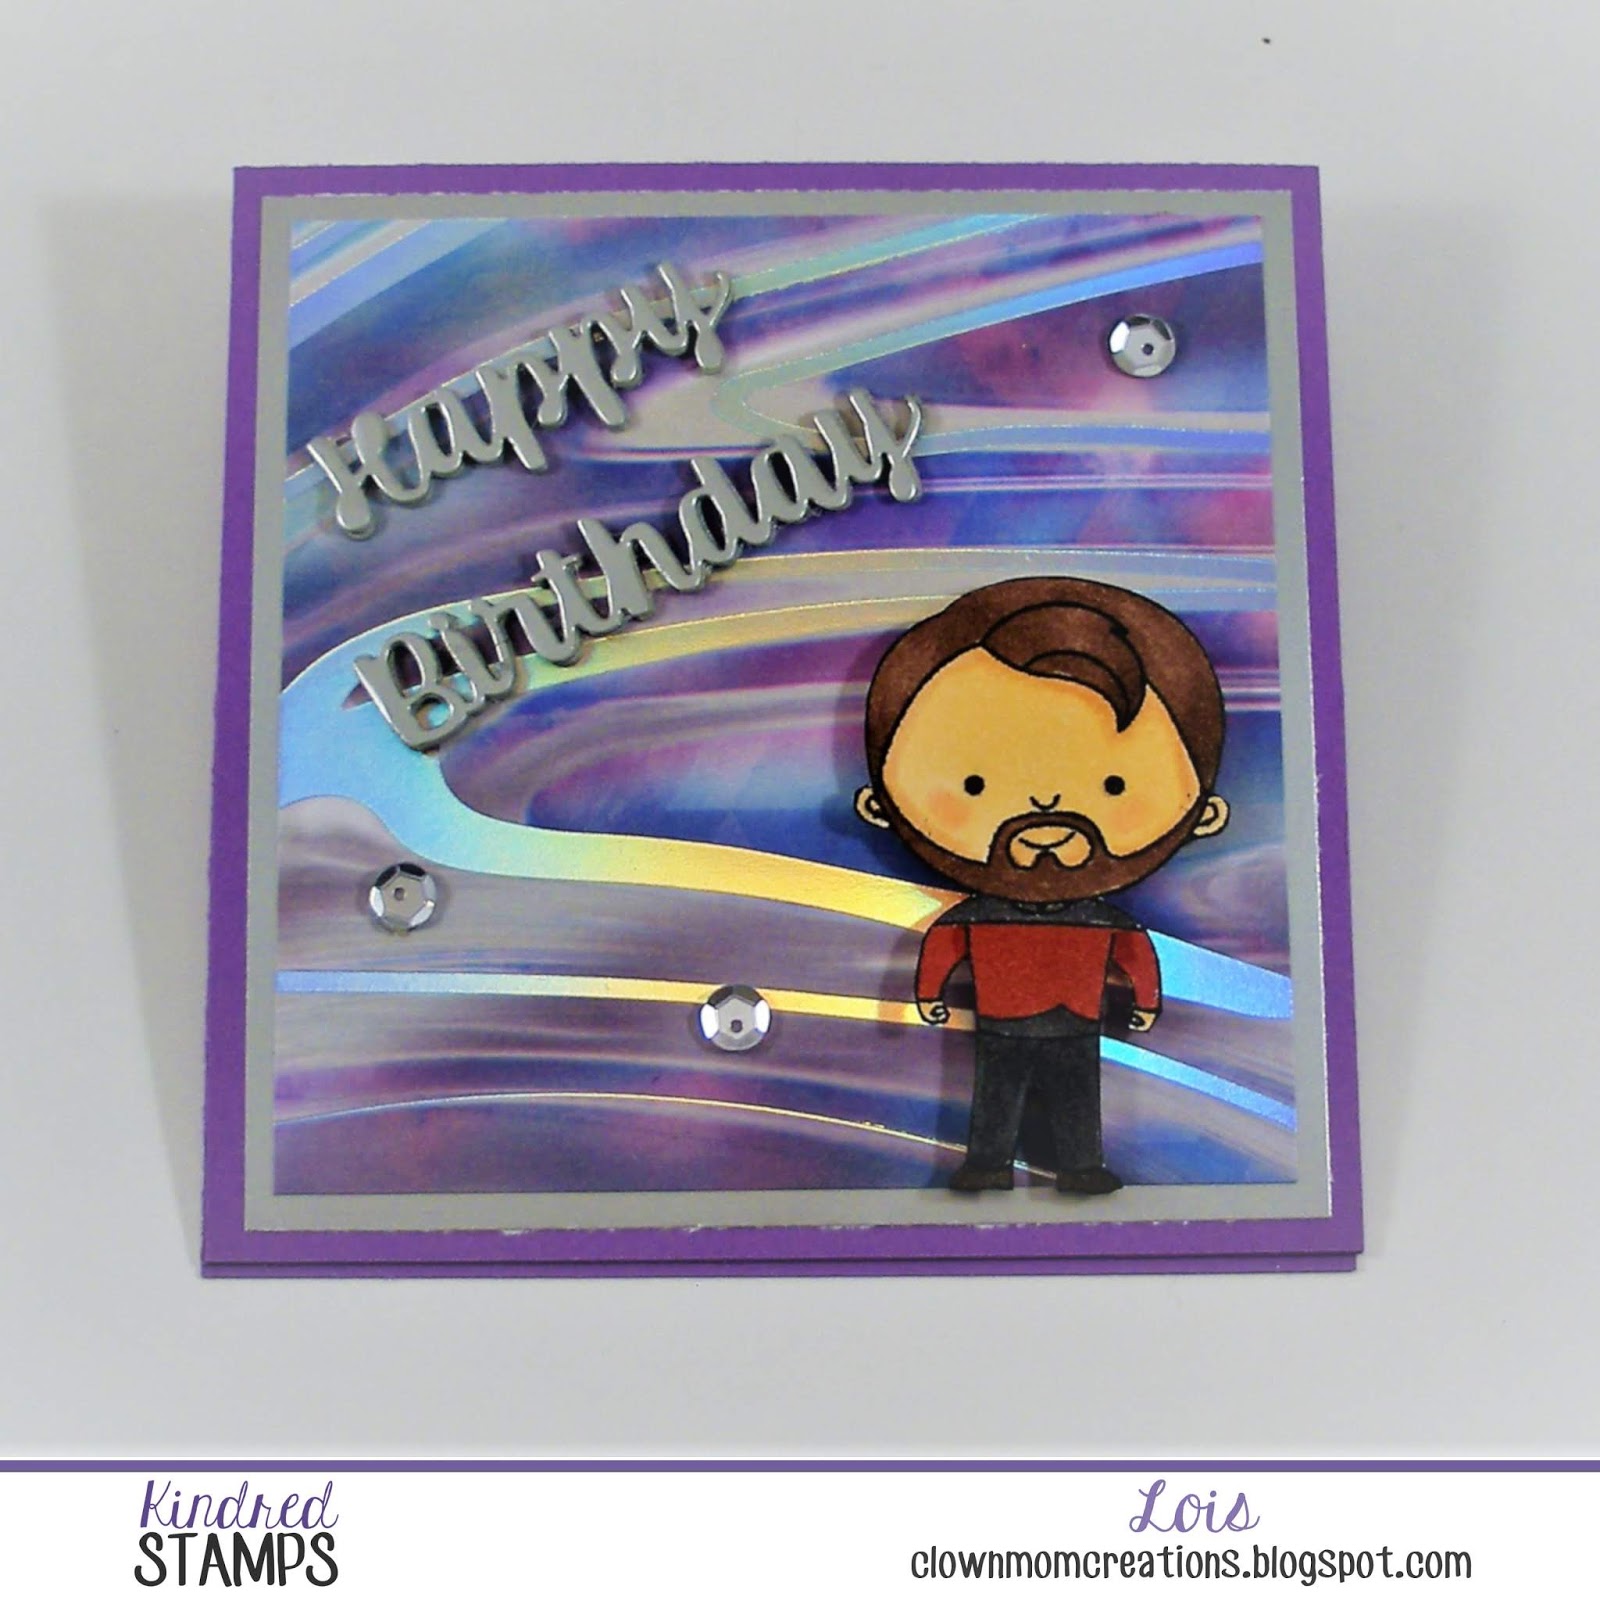
I had found a great pad of patterned paper called Stargazer in Hobby Lobby several months ago -- with lots of designs that lend themselves to several of the "outer space" sets that Kindred Stamps has released. After creating the easel, I stamped, colored and cut out the character for the front and popped him up on foam dots. The "Happy Birthday" sentiment die is from Karen Burniston. I cut it out five times (four from gray cardstock and one from silver paper) and layered them together so that the sentiment would stand out from the background. Then added a few sequins for good measure.
I used one of the coordinating stickers for the "bumper" on the inside to make the easel stand up.
Actually, what I did was put the sticker onto a scrap of heavyweight white cardstock and cut it out so that the bumper would be very sturdy. There's a large foam adhesive pop-dot on the underside of the sticker. As you can see, the easel stands up very nicely.
HINT: To conserve on the more expensive silver paper, I cut the sentiment from one of the matting panels. It was going to be covered up anyway!
Monday, November 19, 2018
Candle Easel Card
As you may know, I love making fun fold cards -- today's is an easel card.
To start my card, I cut all the die pieces from white cardstock.
I lightly sponged the glass candle holder pieces with Ranger Distress Tumbled Glass ink. The rest of the pieces were colored using Copic markers. When they were all colored, I assembled my candle holder.
Red - 4 1/4" x 8 1/2", 4 1/4" square
Patterned paper - 3 1/2" x 3 1/2"
White - die cut the largest Pierced Wide Square Frame
I placed foam tape on the back of the frame and the candle holder . . .
The word "celebrate" is high enough to hold the card open for display.
CottageCutz used on my card are: