
Supplies used in this post:
CottageCutz stamps/dies – On the Farm, Baking in the Kitchen, Aster Flower – September, Marigolds Flower – October
Copic markers
Foam pop dots
Heavyweight cardboard
Scor-Tape
Scor-Pal
Zutter Bind-It-All machine and wires
Scor-Tape
Scor-Pal
Zutter Bind-It-All machine and wires
As I did with the previous months, I stamped, colored and
cut the pieces of the scenery for my last four calendar pages.


I then constructed my scenes, as before, adding whatever
icons I wished for each month.


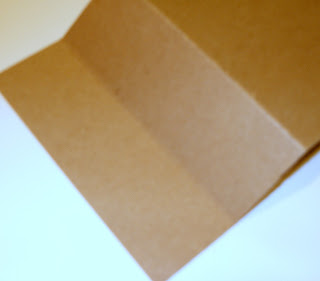
Now I was ready to build my base. It needed to be rather sturdy, so I used
heavyweight cardboard. I cut two panels
slightly narrower (5 ¼”) than my calendar pages and 3 ½” longer (10 ¾”). I scored one of the panels at 7 ¼” and
9”. The other one I scored at 7 ¼”, but
then I cut off 1 ¾” from the end. This
would allow me to be able to fold the base more easily – with less bulk. In addition I cut a small “hinge” for the top
5 ¼” x 2”, scored at the 1” midpoint.


Using a Zutter Bind-It-All, I punched six holes, centered,
at the top of the two base panels and at the mid-point of the “hinge” and then
applied two-sided adhesive tape on the “hinge” and the lower panel of the
shorter base piece.


Carefully, I attached the pieces together to form the base.

Again, using the Bind-It-All, I punched holes at the top of
each calendar page, making sure that they were centered in the machine before I
punched.

Using a 1” Zutter wire, I attached the calendar pages to the
base. And my calendar was finished.

At the end of each month, just flip the page and reveal the
following month. After the June page is
flipped, all that is necessary is to turn the calendar around for July.

And, if you wanted to be able to use the calendar again the
following year, all you would have to do is make new monthly calendars and
carefully replace the old ones. Here are
all the completed pages of my calendar.


I hope you have enjoyed the process of making this
calendar. Maybe you’d like to try making
one yourself!
CottageCutz stamps and dies used on today's post are:


3 comments:
Very impressive, Lois. Wow, such a cute idea.
Lois--I LOVE this calendar!!!! I really need to make one! TFS and for the inspiration!
Lois, this is such a fun calendar project! Love that it's all-inclusive in one unit ... not to mention your great monthly art shared within!
Post a Comment