Monday, December 17, 2018

Ruff Day?

Christmas time is very hectic, and people can get overwhelmed with all the preparations -- shopping, wrapping, food preparation, etc., etc., etc.  My card today is one you could send to a friend who needs a little smile to help with all the madness of the season.  There's plenty of room on the inside of this center-step card to write some encouraging words.


I started my card by constructing the card base, cutting the papers as follows:

White - 5 1/2" x 11"
Black - (2) pieces 3/4" x 4 1/4", (1) piece 3 1/4" x 4 3/8"
Patterned paper - (2) pieces 5/8" x 4 1/8"


I cut a slit at the 1" mark on either side of the card from the 1" mark to the 6 1/2" mark.  Scored from the side of the card in to the slit line at the 1" mark, the 2" mark, and the 6 1/2" mark.  Scored between the slits at the 5 1/2" mark.  To see more detailed instructions for this type of card, see the tutorial on Splitcoaststampers here.

I layered the patterned paper strips onto the black strips and applied to each side, and then adhered the larger black panel to the center section.


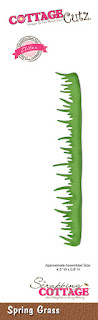
Next I cut the die pieces from white, black and green scraps.  Notice that the Spring Grass die was not fully cut out.  By placing the cutting plate above the lower cut line on the die I was able to enlarge the grass section, rather than cutting it out totally.


Using the packaging as a guide, I then colored and constructed that cute dachshund.


I cut another piece of white cardstock 3 1/8" x 4 1/4".  The background sky was created by sponging Ranger Tumbled Glass ink against a cloud stencil.  I went all the way to the bottom because I would be covering the lower section of the panel with the die-cut grass and wanted to make sure the sky was colored low enough on the background.


I then stamped the sentiment at the top and added the die-cut pieces to the panel, popping up the dog with foam pop-dots and adding the pet border across the bottom.


I hope the holidays haven't worn you down; but, if they have, perhaps this card will lift your spirits.

CottageCutz dies used on my card are:

http://www.scrappingcottage.com/cottagecutzdapperdachshund.aspx

http://www.scrappingcottage.com/cottagecutzcatanddogborderelites.aspx

http://www.scrappingcottage.com/cottagecutzspringgrasselites.aspx


Thursday, December 13, 2018

CCEE1850 Gingerbread Day

Here is the last CCEE Stampers challenge for 2018, as we will be taking a little time to concentrate on family and friends during the holidays. Of course we will be back on the 3rd of January to start another year for fun challenges, hope to see you here too!

We would like to take this opportunity to thank you all for your continued support of our challenges every week, we love that you play along with us.

Wishing you all a Merry and Safe Christmas and New Year.

Now onto our challenge for this week .....

Apparently the 8th of December was Gingerbread Decorating Day and yesterday the 12th of December was Gingerbread House Day. So for our challenge this week Frances asked us to create a card or project that is a Gingerbread theme.  I used the Karen Burniston Castle Pop-Up die and a cute Kindred Stamps gingerbread wizard on my card.


I hope you pop over to the CCEE Stampers blog to check out some more gingerbread fun!


Monday, December 10, 2018

Quick Christmas Card

Sometimes you need a really quick Christmas card in a hurry.  That's what I have for you today.  I think it took me all of about 25 minutes to make.  For me that's pretty quick!  I have a friend who just loves cats.  Even though she has only one at the moment, she refers to herself as that "crazy cat lady."  I think she would like my card.


To start, I cut Miss Kitty from the CottageCutz new Pets release from white card stock.


In addition to Miss Kitty, I cut just the holly leaves and berries from Dakota the Husky, replacing the flower on her hat with the holly leaves.  I then colored all the pieces and constructed my cat.  I wanted the paws to stick out a bit, so I ran a stylus around the back of them and stuck tiny foam pop dots on the back.  I think you can see the dimension.


To reduce a little time, I used a pre-cut card base and then cut a piece of Christmas plaid paper 1 1/2" x 5 1/2" and die-cut the Merry Christmas from a pre-glued scrap of red card stock, which I had previously run through my Xyron sticker maker.


I just glued the plaid paper across the card, added some foam pop dots to Miss Kitty to pop her up, and adhered the sentiment.  I was done -- 25 minutes, start to finish!


CottageCutz dies used on my card are:

http://www.scrappingcottage.com/cottagecutzmisskitty.aspx

http://www.scrappingcottage.com/cottagecutzdakotathehuskyexclusive.aspx

http://www.scrappingcottage.com/cottagecutzmerrychristmaselites.aspx

Thursday, December 6, 2018

CCEE1849 Elf Antics

The CCEE Stampers have only two challenges for December, and Frances is our hostess.  For this week's challenge, Frances tells us that one of the traditions she loves to do at Christmas has to do with the Elf on the Shelf.  She knows that some people love them and some people hate them.  She is in the "love" category and asks us to include an elf on our card today.   I looked through my inventory of stamps and found very few elves.  This one isn't THE elf on the shelf, but it is AN elf on a shelf.  It also reflects my love of Harry Potter!


Check out the CCEE Stampers blog for some more holiday elves!

Tuesday, December 4, 2018

Karen Burniston Designer Challenge - "Ink It!"

This month's Designer Challenge is all about getting inky.  We were to incorporate inks (or paints or sprays or pastes) into a card of any theme.  I love using inking techniques on my cards, so I tried several different ways of using them.  I finally decided on the Northern Lights Technique, which brings lots of color into a night sky.  I took me a couple of times to get a sky that I liked.  This was my winner.  I used dies from the Karen Burniston Tree Pop-Up, the Houses Pull Panels, and the House and Fence to create my card.


The front of the card is relatively simple, just the tree and a sentiment.


Another top contender for my choice for this month's challenge was an accordion card made using the Galaxy Background technique.  But I use that technique A LOT and wanted to try something different.  I thought I'd show it to you today anyway.  This was made using the Fancy Label Accordion, along with the Fancy Flourish Frames dies.


This is the front of the card when it's closed.


Monday, December 3, 2018

Christmas Ornaments

I have a really quick project for today -- some Christmas ornaments made with a couple of CottageCutz dies.


To start I cut all the pieces of the Snowglobe, Winter Accessories die from white cardstock.


I then colored the individual pieces with Copic markers and constructed each character.


I then cut the largest Nested Ornaments - Ball die from three different colors and the caps from gold cardstock.


It was just a matter of choosing which character would go on which ornament.


I added a bit of gold twine to each ornament. and they were done.


CottageCutz dies used on my ornaments were:

http://www.scrappingcottage.com/cottagecutzsnowglobewinteraccessories4x6.aspx

http://www.scrappingcottage.com/cottagecutznestedornamentsballbasics.aspx

It looks like the Snowglobe, Winter Accessories is currently out of stock, but it will return soon.

Saturday, December 1, 2018

Scor-Pal December Challenge -- Anything Goes Christmas

The December challenge on the Scor-Pal blog is "Anything Goes Christmas."  I love making pop-up box cards with my Scor-Pal, but I wanted to try something a bit different.  I had made a pop-up box card once before in which I placed an acetate sheet on the front so that you could see inside the box.  That's what I did for this month's challenge also.  The top of the box is chock full of pretty Christmas foliage . . .


. . . but the inside has a cozy little fireplace scene.