Thursday, July 12, 2018

CCEE1828 - National Simplicity Day

Lynn continues as hostess for the CCEE Stampers this week, telling us that today is National Simplicity Day, in honor of Henry David Thoreau, who was a devoted advocate of living a life of simplicity.  So on this lazy day of summer, her challenge to us was to create a clean and simple one-layer card.

Some time ago I bought a set of stamps inspired by the "simple" thoughts of kids.  I used one of them on my card today.  What is better than a friend with chocolate?


Check out the rest of the simple cards created by the rest of the CCEE Stampers team over on the blog.

Monday, July 9, 2018

Special Thank You

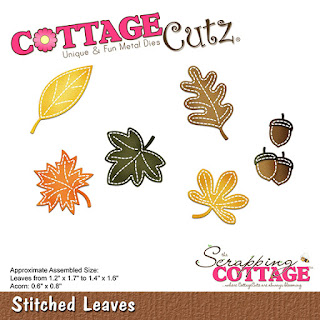
As I mentioned last week, during the month of July the CottageCutz design team is reminding you of some older dies when making their cards.  My card uses two such dies -- Stitched Leaves and the Pierced Wide Rectangle Frame Set.


To start my card, I cut the stitched leaves from a piece of white cardstock.


I then colored the pieces with Copic markers.  I had originally planned to use a white pen to make the stitches more pronounced, as is shown on the packaging; but I was not happy with the results on the first leaf I tried.  So I turned it over and colored the back so it was not wasted.


I then cut the card base pieces and the frame.  The cream card base is 5 1/2" x 8 1/2", scored at 4 1/4"; and the inside of the frame is 3 5/8" x 4 5/8".  I used the largest frame die.


I adhered foam tape on the back of the frame.


After constructing the card, I laid out the leaves down the side of the frame to see how much room I would have for my sentiment.


I removed the leaves and stamped the sentiment.


I then replaced the leaves, gluing them down over and under the frame, as well as the acorns at the bottom.  And my card was finished.


CottageCutz dies used on this card are:

http://www.scrappingcottage.com/cottagecutzstitchedleaves.aspx

http://www.scrappingcottage.com/cottagecutzpiercedwiderectangleframesetbasics.aspx

Thursday, July 5, 2018

CCEE1827 - Impossible Card

Lynn starts her month as hostess for the CCEE Stampers with a currently popular fun fold card -- the Impossible Card.  She says, "This new fun fold card, based on a famous card trick, is sweeping the internet.  I thought it would be great if the CCEE Stampers put their own 'twist' on this design this week.  Here is a link to a tutorial by Maymay Made It Crafts that will show you what it is all about!  It demonstrates the Impossible Card in several varied sizes."

Here's mine -- made with a cute train die from CottageCutz and some old stamps from the MFP Stamp Shop.


Be sure to check out all the other fun Impossible Cards over on the CCEE Stampers blog.

Monday, July 2, 2018

Quick Gift Card Holder

The CottageCutz design team is going to pull out some older dies during the month of July and show them off.  I used the Filigree Daisy Envelope to make a quick gift card holder, adding one of the Expressions Plus sentiments.


I cut the envelope from a piece of purple cardstock.


The base of the card is just a 5 1/2" x 8 1/2" piece of purple cardstock and a 4" x 5 1/4" piece of patterned paper.


After folding on all of the score lines on the envelope, I added some narrow Scor-Tape to the side tabs.


I then cut the sentiment twice -- once in purple and once in shimmery white.  I had run the scraps of cardstock through my Xyron machine prior to cutting so that I could adhere them easily.


I used Scor-Tape on the back of the envelope for good adhesion to the card.


I adhered the envelope at the bottom of the card and layered the two sentiments at the top -- on an angle.


To hold the flap closed, I cut a strip of Velcro . . .


. . . and placed it behind the daisy.  I closed the flap to place the second piece on the envelope.  I trimmed the portion that was above the opening.


I then added a few sequins and inserted the gift card.


Here again is my completed card.


I would encourage you to look through the CottageCutz website and see what you may have missed.


Sunday, July 1, 2018

Scor-Pal "More Than One Score" challenge - 3 of a Kind

The Scor-Pal "More Than One Score" challenge this month is "3 of a kind."  We were to make a "matched set."  For my matched set, I made a greeting card and a tote that holds four 3" x 3" notecards.  I used a couple of fun sets from Kindred Stamps on each of the pieces.


I took photos along the way as I made my project, and I'll have a tutorial on my blog on the 15th of the month.  I hope you'll come back and take a look.

Thursday, June 28, 2018

CCEE1826 - RELAXATION Challenge

Joanne finishes up her month of CCEE Stampers challenges with the theme of "RELAXATION."  She asks us to create a card that depicts RELAXATION to us.  It can be a place where we are relaxed or what we do to relax.  I know many of us stampers relax by creating works of paper art.  That is what my card depicts.  I created the background paper with a small "stamp" stamp!   And I am happy to say that I have fulfilled my personal challenge of using the same layout for all four of my CCEE cards this month.


Be sure to check out the CCEE Stampers blog to see how the rest of the team relaxes!

Monday, June 25, 2018

Dad's Tool Box

Today's card is a labor of love.  My late husband was an auto mechanic, who had several large tool chests, chock full of the tools of his trade.  When I saw the new "Just for Guys" release from CottageCutz, and particularly the die called "Dad's Tools," I knew I would have to make a card like this one.


If you've followed my blog at all, you know that I love fun-fold cards.  This card is a variation on a side-step card, but with only one step on the side rather than two.  To start the card, I cut a piece of 110# red cardstock 8 1/2" x 5 1/2".  I cut a slit longways down the center (at 2 3/4") from the 3 1/4" mark to the 7 1/2" mark.  Then I scored the left side at 4 1/4" and the right side at 3 1/4", 6 1/2" and 7 1/2".

For the small pieces, I cut cardstock as follows:

Red - 5 1/8" x 5/8", 2 3/8" x 2 7/8", and 2 3/8" x 5/8" (2 pieces)
Silver - 5 1/4" x 3/4", 2 1/8" x 3", and 2" x 2 1/2"
Medium Gray - 2 1/4" x 2 3/4"


On the three small pieces, I drew a horizontal black line at 1/4" and then scored on that same line.


I then adhered Scor-Tape on the sides and bottom of each piece.


The three pieces were then adhered to the silver pieces.  The gray piece was centered on the coordinating silver piece, and the red door piece was vertically scored at 1/4" from the left side and attached over the gray piece, as shown in this photo.  I drew a black line around the gray piece to give a bit more dimension.


These were then glued to the front of my step card.

I drew some lines inside the door to give the effect of the floor and shelf.

I then cut the images from the Dad's Tools die -- in both silver and white, picking out which pieces would be silver and which ones would be colored . . .


. . . and constructed the various tools.


My husband's tool check was on wheels, so using die-cut pieces from both the Classic Car and the Train, Bike and Plane dies, I made some wheels for the bottom of my tool chest.


I added the wheels to the bottom of the front of my card and placed the other die-cut pieces in the drawers and/or cabinet, utilizing one of the unused silver screwdriver handles as a handle on the cabinet door.  Because the wheels were rather small, I decided to reinforce them by cutting a strip of clear acetate packaging about 1" high and long enough to span the space between the wheels.  I added some Scor-Tape to the top and sides.


I adhered the acetate strip between the wheels, stamped an appropriate sentiment on a small piece of silver cardstock and glued it to the front of the cabinet door -- and I was finished.


Here is a photo of the inside of the cabinet.


CottageCutz dies used on this card are:

http://www.scrappingcottage.com/cottagecutzdadstools.aspx

http://www.scrappingcottage.com/cottagecutzclassiccar.aspx

http://www.scrappingcottage.com/cottagecutztrainbikeandplane.aspx