Thursday, August 31, 2017

CCEE1735 Monochromatic and Die Cuts

Anne winds up her month as hostess for the CCEE Stampers this week.  She told us that she once did a challenge on SCS, asking our fellow crafters to make a one-color card and using only die cuts (or punches).  She asked us to do the same.  I started off my month of CCEE tags with a Christmas tag, so I thought I would end the month with another one.


Stop over at the CCEE Stampers blog to see how the rest of the team handled this very fun challenge.

Monday, August 28, 2017

Wedded Bliss Club

August has always been a month for weddings for me.  My late husband and I were married in August fifty-five years ago.  So I'm bringing you another card made with the newly-released wedding series of dies from CottageCutz.  This time that cute little owl couple, as well as the stitched rectangle scallops..


I cut the many pieces for my little scene from various scraps of colored cardstock.


I added some additional color to some of the pieces to give them a bit of dimension.


Purple is one of my favorite colors, and my card reflects that.  Both the card base and the patterned paper accent are in shades of purple.  The card base is 5 1/2" x 8 1/2", scored in half; the patterned paper is cut slightly smaller.  My scene will appear on a piece of pale blue cardstock glued to the largest stitched scallop rectangle die cut.  In addition I cut a 1" x 4" piece of black cardstock for the road and tore a narrow strip of green for the grass.


I constructed the background for my focal panel, as shown.  I "borrowed" an idea from my fellow DT member, Pam, and drew a broken white line down the center of the road.  I had seen that on a card that she made a few weeks ago.  Thanks, Pam for the idea!


Then came the fun part of putting the bicycle and owls together.  


I then stamped the sentiment, punched it out, and finished my card.


I realize purple is not most people's first choice for a wedding card; but, as I mentioned, I love that color!  And I think it goes well with the whimsical bride and groom owls.

CottageCutz dies used on my card are:

http://www.scrappingcottage.com/cottagecutztandembike.aspx

http://www.scrappingcottage.com/cottagecutznestedstitchedscalloprectangleset.aspx

http://www.scrappingcottage.com/cottagecutzspringgrasselites.aspx

Thursday, August 24, 2017

CCEE1734 Water Color

Anne really challenged me this month.  She asked the CCEE Stampers to make a background using water colors.  We could then finish our cards in whatever way we wished.  Watercolor is not my strong suit.  I made a simple background using watered down distress inks.  I did, however, thoroughly enjoy making the rest of my tag.


Hopefully, the rest of the team did a better job with their watercoloring.  Check out their cards on the CCEE Stampers blog.

Monday, August 21, 2017

Holly Swag

It is 90 degrees outside, but I'm here to cool you off a bit with a Christmas card today.  I'm still playing with the new Nested Shapes release from CottageCutz -- this time the Nested Stitched Eyelet Square set, as well as one of the Expressions Plus sentiments.


A little twist to this card is that the "Happy Christmas" sentiment is actually on the inside of the card.  It shows through a strip of acetate on the front.

To start my card I cut the 8 1/2" x 5 1/2" card base from some heavyweight white cardstock.  In addition I cut two strips of red (1" x 5 1/2"), two strips of green (1/2" x 5 1/2"),  a white 2 1/2" x 2 1/2" square and a strip of clear acetate 2 1/2" x 5 1/2".


After scoring the card base at the 4 1/4" mark, I trimmed a 1 1/2" strip from the bottom and adhered it to the acetate strip.  I trimmed that side of the card 1 1/4" from the top, adding Scor-Tape to the top of the acetate and the edge of the card.


After removing the Scor-Tape, I lined up the acetate/cardstock piece to the bottom of the card and pressed down on the taped sections -- creating the card base.


Next I cut the die-cut pieces from red and green cardstock . . .


. . . adding some darker color to the pieces.  I sponged around the edge of the white square with red distress oxide ink.


Using a scallop punch, I trimmed down the red strips, adding some 1/8" Scor-Tape to the backs.


I then constructed my holly swag, using small foam pop dots to give dimension to the swag.


I then stamped the inside of the card, making sure that the sentiment was placed so that it would show through the acetate strip.


I then added the red/green strips to the outside of the acetate and constructed the swag panel and glued it on either side of the acetate strip.  The "celebrate" sentiment was centered at the bottom of the card front.


CottageCutz dies used on this card are:

http://www.scrappingcottage.com/cottagecutznestedstitchedeyeletsquareset.aspx

http://www.scrappingcottage.com/cottagecutzhollybranchwbow.aspx

http://www.scrappingcottage.com/cottagecutzexpressionspluscelebratephrase.aspx


Thursday, August 17, 2017

CCEE1733 Nautical

Anne continues as hostess for the CCEE Stampers this week, and asked us to use a nautical theme on our cards.  Please don't look too closely to the text behind my nautical images.  I did it on the computer and wound up spelling John Masefield's name wrong.  My apologies to the poet!


Be sure to stop over at the CCEE Stampers blog to see more nautical cards.

Tuesday, August 15, 2017

Scor-Pal "More Than One Score" - Happy Birthday, Space Dude

This month's "More Than One Score" challenge on the Scor-Pal blog was 3-D cards, something that I love to make.  For my card, I made a Z Box Pop-Up Card, which was lots of fun to make.  I used some new stamps from Kindred Stamps called Galactic Adventure and combined them with some stamps from an old set from MFP Stamp Shop, which unfortunately is no longer in business.  Star Wars nerd that I am, I had lots of fun making this card.


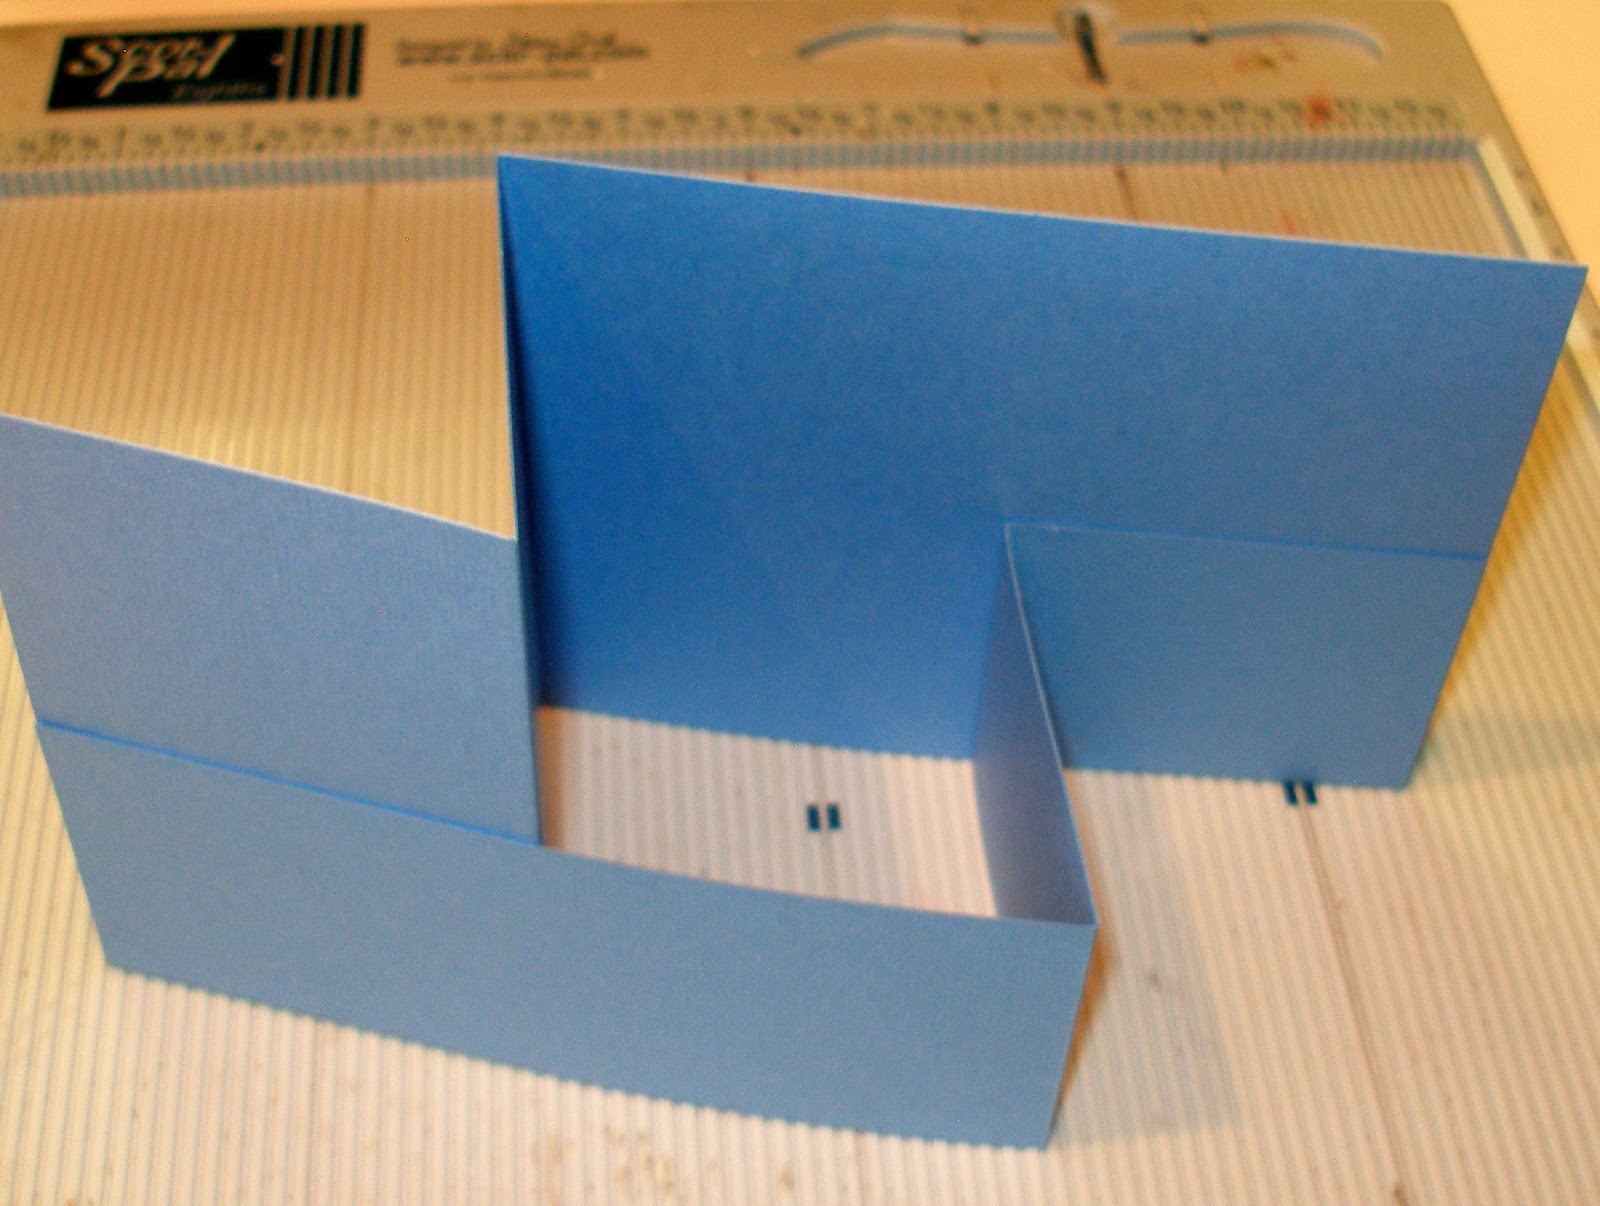
To make a Z Box Pop-Up Card, cut 2 pieces of blue cardstock, one 4 1/4" x 11" and the other 2 1/8" x 11", scoring them both at 2 3/4" and 5 1/2", as shown.


Fold on score lines in opposite Z-folds, as shown . . .


. . . and glue the narrow one to the front of the card base, as shown.


Using the remaining 2 1/8" x 11" strip, score at 7/8", 3 5/8", 4 1/8", 6 7/8", 7 3/8", and 10 1/8".  Fold as shown.


Apply double-sided adhesive tape to the folds, as shown . . .


. . . and repeat on the other sections on the opposite side.

Remove paper backing from the double-sided adhesive tape and carefully fit the folded strip into the box in the card base.


You can then decorate your card.  Add the patterned paper to the back and front panels.  Cut the sky paper to 4" x 5 1/4" and cut in half (5 1/4" x 2").  Adhere one half to the top of the back panel.  Cut the remaining piece in half (2 5/8" x 2") and add to the right side of the back panel and the top of the front panel.  Cut the other patterned paper to 5 1/4" x 2" and adhere to the bottom of the front panel.

Stamp the images of Han Solo, Princess Leia, Luke Skywalker, the rocket, and the planet -- and color with markers.  Carefully fussy-cut the images and attach to the card.  Stamp the sentiments and cut out with a punch -- and adhere as shown.


Here is a close-up of the inside of the pop-up box portion of the card.


And may the Force be with you!!!

Monday, August 14, 2017

Going to the Chapel

I'm still playing with the new dies that CottageCutz has recently released.  You can find them on the CottageCutz website.  They are a series of wedding dies and a series of nested shapes.  I have another wedding card today, which uses dies from both series.


To begin the card, I cut a piece of heavyweight white cardstock 5 1/2" x 8 1/2, a piece of Glittery Pink cardstock 4" x 5 1/4", and a piece of shimmer white cardstock 3 7/8" x 5 1/8".


Then, using several CottageCutz dies, I cut the various die-cut pieces from shimmer white, pink glitter, and black glitter cardstock.


Before constructing my card, I embossed the shimmer white panel with a swirly embossing folder.


I added small foam pop dots to the back of the carriage . . . 


. . . and ran the two small black die-cuts through my Xyron X sticker maker.


Then I constructed my card and added a few sequins which matched the color of the carriage.


CottageCutz dies used on my card are:

http://www.scrappingcottage.com/cottagecutznestedscallopovalset.aspx

http://www.scrappingcottage.com/cottagecutzweddinghorseandcarriageelites.aspx

http://www.scrappingcottage.com/cottagecutzlittlechapelpetites.aspx

http://www.scrappingcottage.com/cottagecutzlovebirdbranch.aspx


Thursday, August 10, 2017

CCEE1732 Insects

For her second challenge to the CCEE Stampers this month, Ann asked us to make a card using bees, dragonflies, any kind of inset.  She also asked us to add some Stickles to their wings (if they have wings).  My insects do have wings, but I added Wink of Stella to their wings.  I did, however, add Stickles -- but to the "glow" of my fireflies.


Stop over at the CCEE Stampers blog to see some more insects this week.

Monday, August 7, 2017

Wedding Doves

A wedding is such a wonderful occasion for which to make a card.  You can go elegant or you can go fun.  I think my card today is somewhere in between the two.  CottageCutz has recently released two series of dies, both of which contributed to my card today.  There is a wedding set and a series of nested shapes.  I used one die from each set along with some wedding paper that I had in my stash.


To begin I cut a piece of heavyweight white cardstock 8 1/2" x 5 1/2", one piece of patterned paper 4" x 5 1/4" and another piece of patterned paper 3 3/4" x 2 3/4".


Then I cut the die-cuts from pink, green, and shimmer white cardstock.


Using some Copic markers, I added some color to the doves and the small hearts.


I placed some large foam pop dots on the pink die-cut panel.


The wedding paper that I used came in a pad which also included some pop-out die-cut pieces.  I found one that I liked and added the two small pink hearts to it.


I applied some liquid glue to the back of the branch . . .


. . . and some foam pop dots to the backs of the doves.


And then I constructed my card.


CottageCutz dies used on this card are:

http://www.scrappingcottage.com/cottagecutznestedstitchedeyeletrectangleset.aspx

http://www.scrappingcottage.com/cottagecutzfancydoveswithvine.aspx