Spring is making its way into Florida at last. After a few cool/cold snaps, it's finally getting more like Florida weather around here. CottageCutz has a new Spring release with some really cute flowery and Easter dies, which are on sale for a short while longer. I've used several of them on my card for today.
I started my card by running a strip of white cardstock through my Xyron sticker maker and then cutting out the Spring Window w/ Vine.
By putting the adhesive on the back of the cardstock prior to cutting, I'll be able to construct my window more easily on the card.
I cut my card base as follows:
Purple - 8 1/2" x 5 1/2"
Gray - 4" x 5 1/4"
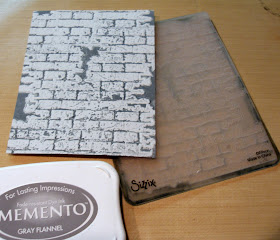
I wanted a brick background for my bunny, so I used a favorite technique of inking up my embossing folder with gray ink prior to running the cardstock through my Cuttlebug. The ink is pressed onto the paper, creating the "mortar" between the bricks.
I then cut two sets of shapes from the Spring Meadow die. I did this because I knew I would need more than just the single set of die-cuts for my little scene.
After coloring both the Spring Window and Spring Meadow die-cut pieces with Copic markers, I constructed my scene on the brick background.
As you can see, I saved the inner white pieces of the window to place into the window frame. When I attached the front layer of grass, I put narrow strips of foam tape behind the die-cut pieces. This would allow me to insert the bunny behind the grass. I wanted to wait until after the bunny was on the card before placing the butterflies.
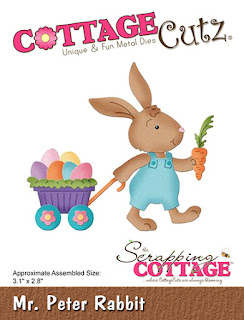
I then cut the bunny out . . .
. . . and colored him and his wagon and eggs with markers.
After constructing Mr. Peter Rabbit and his wagon full of eggs, I placed some small foam pop dots behind his head as well as the wagon and some glue behind his feet. That way his feet would slip in behind the grass, but his head, body, and wagon would be popped up.
I then added the butterflies in the open space next to the window, and my card was completed.
CottageCutz dies used on my card are:


